
By Nathan E. Malpass, Last updated: September 18, 2023
In the vast landscape of digital data, have you ever wondered what happens to restored files after they've been brought back from the brink of oblivion? Where do restored files go? How do they transition from the realms of digital limbo to reintegration into our digital ecosystems?
This article delves into the fascinating journey of restored files. We'll explore where these files find themselves after being rescued, shedding light on the mechanisms that facilitate their recovery. Additionally, we'll guide you through the process of locating and retrieving these restored files, providing you with the knowledge to navigate the intricate pathways of data recovery.
So, buckle up as we embark on a journey to understand not only where restored files go but also how to seamlessly reunite them with your digital existence.
Part #1: Where Do Restored Files Go on Windows Computers?Part #2: Where Do Restored Files Go on macOS Systems?Part #3: How to Restore Files on Windows And macOS Systems Using FoneDog Data Recovery ToolConclusion
When it comes to the world of digital restoration, Windows computers offer a range of options to recover lost or deleted files. Whether you accidentally deleted a crucial presentation, lost an irreplaceable family photo, or even worse Windows removes everything after an update. Windows provides tools and methods to retrieve these files from the brink of loss.
But once these files are restored, where exactly do they go? Let's explore where do restored files go on Windows computers.
In the realm of Windows, the Recycle Bin acts as a safety net for deleted files. When you delete a file, it's not immediately obliterated from your system. Instead, it's sent to the Recycle Bin, which acts as a temporary storage area. This allows you to easily retrieve files in case of accidental deletions.
If you've recently deleted a file and need to restore it, simply open the Recycle Bin, locate the file, right-click on it, and select the "Restore" option. The file will be returned to its original location.
Windows offers a feature called "System Restore" that creates checkpoints in time, capturing your computer's settings and files. If your system encounters issues, you can use these restore points to revert your computer to a previous state.
This can be particularly useful if you've lost files due to software glitches or system errors. Restoring your system to a previous restore point can potentially bring back the missing files.

Windows 10 introduced the "File History" feature, which periodically backs up your files to an external drive or network location. If you've enabled File History and lost a file, you can use this feature to restore previous versions of your files. This is especially handy for recovering overwritten or corrupted files.
In scenarios where files are permanently deleted or removed from the Recycle Bin, third-party data recovery software comes to the rescue. These specialized tools scan your storage device for traces of deleted files and attempt to recover them.
When using such software, restored files might not necessarily return to their original locations. Instead, they are often restored to a specified folder or location of your choice.
In the next part of this series, we'll shift our focus to macOS systems and explore the path that restored files take on Apple computers. Understanding the journey of restored files not only empowers you to recover your precious data but also gives you insights into the intricacies of data management on your chosen operating system.
In the world of macOS systems, the process of restoring lost or deleted files on Mac follows a unique path. Apple's operating system provides users with several mechanisms to recover their valuable data. If you've ever wondered where do restored files go on macOS systems, this section will unravel the journey they take.
Similar to the Recycle Bin on Windows, macOS has the Trash. When you delete a file on a Mac, it's moved to the Trash rather than being instantly deleted. This allows you to recover files if needed. To restore a file from the Trash, simply open it, locate the file you want to recover, right-click, and select "Put Back". The file will be returned to its original location.
Time Machine is macOS's built-in backup solution. It creates regular backups of your entire system, including files, applications, and settings. If you lose a file, you can use Time Machine to travel back in time and restore it from a previous backup. This is especially useful when dealing with files that were lost due to hardware failures, accidental deletions, or other issues.
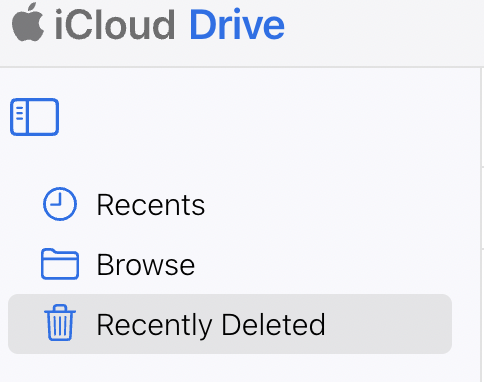
For users who utilize iCloud, Apple's cloud storage service, deleted files might find their way to the "Recently Deleted" folder within the iCloud Drive. This folder serves as a temporary holding area for deleted files, giving you a chance to restore them before they're permanently removed. Restoring a file from the "Recently Deleted" folder puts it back into its original location within your iCloud Drive.

When traditional methods fall short, macOS users can turn to third-party top Mac optimizer software. These applications scan storage devices for traces of deleted files. However, most of them might lack recovery ability. Instead, you'll need a versatile tool which we will introduce to you down below.
Understanding the journey of restored files on macOS systems not only ensures you can retrieve your lost data but also underscores the importance of regular backups and effective data management practices. Whether you're utilizing native macOS features or third-party solutions, the ability to recover files can alleviate the stress of accidental deletions or data loss events.
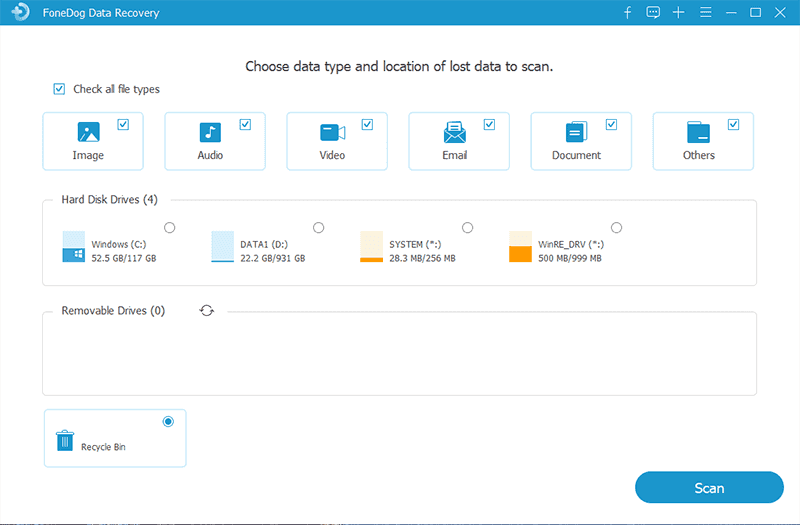
Now you know where do restored files go, it’s time to get them back. In the realm of data recovery, third-party tools often play a crucial role in retrieving lost or deleted files. One such tool that stands out is the FoneDog Data Recovery.
Data Recovery
Recover deleted image, document, audio and more files.
Get deleted data back from computer (including Recycle Bin) and hard drives.
Recover loss data caused by disk accident, operation system crushes and other reasons.
Free Download
Free Download

Whether you're using a Windows or macOS system, FoneDog provides a comprehensive solution for recovering your valuable data. In this section, we'll walk you through the steps of using the FoneDog Data Recovery Tool on both operating systems.

Key Tips:
The FoneDog Data Recovery Tool simplifies the process of file restoration on both Windows and macOS systems. Whether you're dealing with accidental deletions, system crashes, or other data loss scenarios, having a reliable data recovery tool in your arsenal can make all the difference in retrieving your valuable files.
People Also ReadThe Best Guide on How to Fix Drive Is Not Accessible, Access is Denied in Windows6 Step-by-Step Ways: How to Factory Reset Windows 10 without Password
In the world of data recovery, understanding where do restored files go is essential for effective file retrieval. These restoration mechanisms not only provide relief from accidental data loss but also emphasize the significance of regular backups, effective data management, and the role of reliable data recovery tools. By embracing these practices and tools, you can confidently navigate the digital landscape, knowing that your valuable files are never truly lost, only waiting to be rediscovered.
Leave a Comment
Comment
Data Recovery
FoneDog Data Recovery recovers the deleted photos, videos, audios, emails, and more from your Windows, Mac, hard drive, memory card, flash drive, etc.
Free Download Free DownloadHot Articles
/
INTERESTINGDULL
/
SIMPLEDIFFICULT
Thank you! Here' re your choices:
Excellent
Rating: 4.4 / 5 (based on 107 ratings)