

By Nathan E. Malpass, Last updated: October 25, 2018
Nowadays people use their iPhone's for so many things. It's no longer just a device for communication but it also serves as our on the go assistant by keeping files that we need handy.
It may be pictures, or documents necessary for work or keeping track of your schedule for the day. There is a lot that you and your phone go through together every day.
Apple has been known for the quality of its devices but it is never safe from malfunctioning and errors. What if your iPhone crashed, or you accidentally deleted an important file or worse it gets lost or stolen.
All those files that you hold dear, photos, contacts, documents, gone just like that. That is why it has been highly suggested that users create a backup of their data to avoid complete loss files. It would allow you to be able to retrieve what you thought is no longer accessible to you.
There are numerous ways to create a back up of your data even if you don't have a Mac. You can get access to all your iPhone files even if you are using a Windows based PC. It only becomes limited as to which data can be backed up and retrieved.
Like for example using iTunes will only allow you to back up certain contents of your iPhone i.e. photos, contacts, and videos.
Either way, it is still useful since you will be able to save some if not all of the data that you find valuable. Read on to find out which would suit you best.
After years of coding software for iOS devices, we have created a useful and powerful tool that everyone is able to use.
Here is a tip: Download FoneDog iOS Data Backup and Restore to access your iPhone files easily. If you want to do this all by yourself, we also collected some great ideas below.
iOS Data Backup and Restore One click to backup the whole iOS device to your computer. Allow to preview and restore any item from the backup to a device. Export what you want from the backup to your computer. No data loss on devices during the restore. iPhone Restore Won't Overwrite Your Data Free Download Free Download
Part 1: How to Access iCloud Files from Windows PCPart 2: How to Access iPhone Files on Windows 10 by iTunesPart 3: Accessing Your iPhone File Backups in Windows 10Part 4: The FoneDog Toolkit-Windows 10 best partner to access your iPhone filesConclusion
People Also ReadEffectively Read iPhone Messages on Windows 10Complete Guide to iTunes Backup Recovery on Windows 10
Ensure that you have set up iCloud on your iPhone. You can either have it set to automatically back up or do a manual one.
The good thing about being able to use iCloud on your windows based PC is that you can still get access to your stored files across all your Apple devices.
You can even manage bookmarks that you may have on other browsers like Google and Mozilla just like you can with Safari and it will be available and synced amongst all your other devices.
Keep in mind as well to enable "iCloud Drive" to be able to store documents and then "Desktop and Documents" if you have stuff you want to be accessible from your Mac. Below are the steps to use iCloud to retrieve your iPhone files.
So let's say for example you have files you uploaded to your iCloud drive those will be stored directly to the iCloud Drive folder on your PC which would, in turn, be available across all your devices. Convenient right?
Important Note: Make sure you always have an updated version of iCloud on your PC. To set it for automatic check based on your preferred schedule go to Edit>Preferences. You can also manage your storage preferences for iCloud on your PC.

This is pretty convenient if you don't have a Mac. To be able to sync your device on your Windows PC and create a back up all you have to do is download the software. Here are the steps on how to get it.
(Important Note: You can have up to five devices authorized to your name when using this platform)

To locate the list of back up files available in your drive you would need to go to this location \Users\(username)\AppData\Roaming\Apple Computer\MobileSync\Backup\
Or as an alternative, you can use the search option on your PC. For Windows 10 you just need to go to the Search bar which can be found right next to the Start icon.
Once you are there put in %appdata% or if you downloaded iTunes from the MS store you would need to enter %USERPROFILE%.
When you hit enter the results should show you either "Apple" or "Apple Computer". These should lead you to all available backups on your computer.
Now the thing about using iTunes on a windows based PC has been severely questioned and many iPhone users have found that it is hard to get around using with regards to creating backups for their files.
One thing that ticks off users is that if you have contents that you purchased from the Apple store that you have stored on iCloud, you won't be able to access them easily when you run the app on your Windows PC.
You have to sift through your purchases from the Store tab. There are so many differences when you use iTunes on Windows which is a drag from people who are depending on the platform to manage some if not all of their iPhone contents.
That's the good thing about having a third party app that would do such a task for you with ease. The FoneDog Toolkit has features that would allow you to keep your data safe and be able to access them readily when you need to.
The iOS Data Backup and Restore feature not only secures your files but does so much more for you. Read on to learn more about how to use it with Windows 10 to access your iPhone files.
iOS Data Backup and Restore One click to backup the whole iOS device to your computer. Allow to preview and restore any item from the backup to a device. Export what you want from the backup to your computer. No data loss on devices during the restore. iPhone Restore Won't Overwrite Your Data Free Download Free Download
Using your iPhone's original USB cable connect it to your PC. Download and install the FoneDog Toolkit. Installing it is a breeze so once done launch the software and wait for your device to be detected.
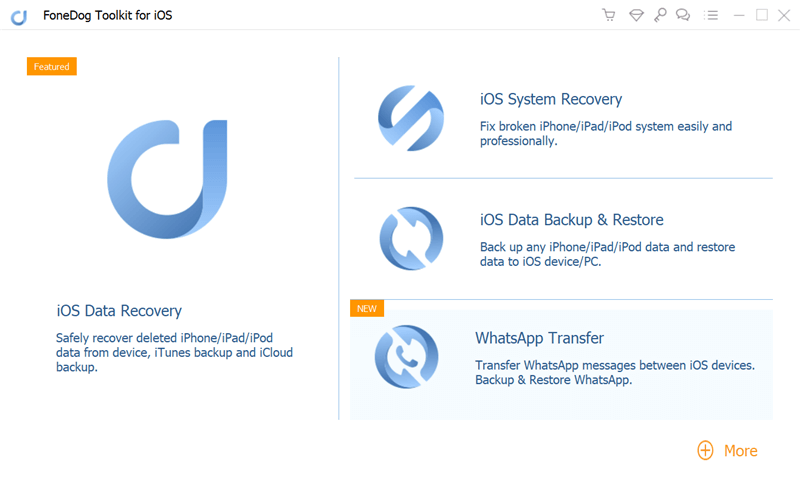
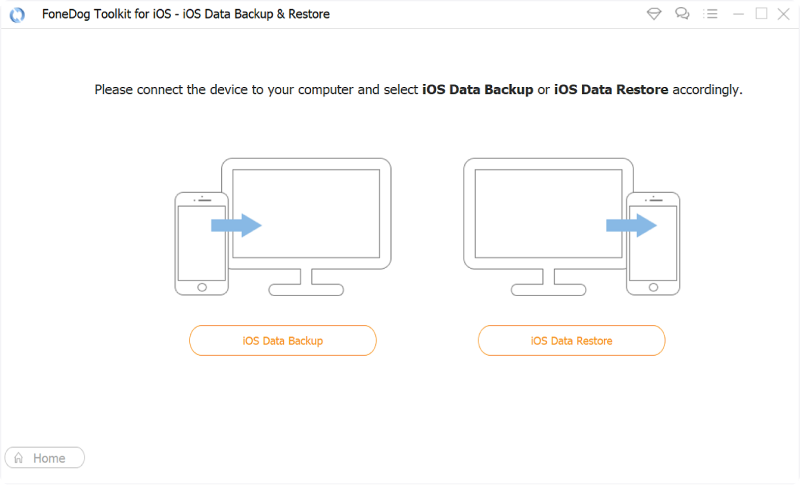
From the main dashboard of the toolkit go to "iOS Data Backup and Restore" then click on "iOS Data Backup" and click on next to continue.
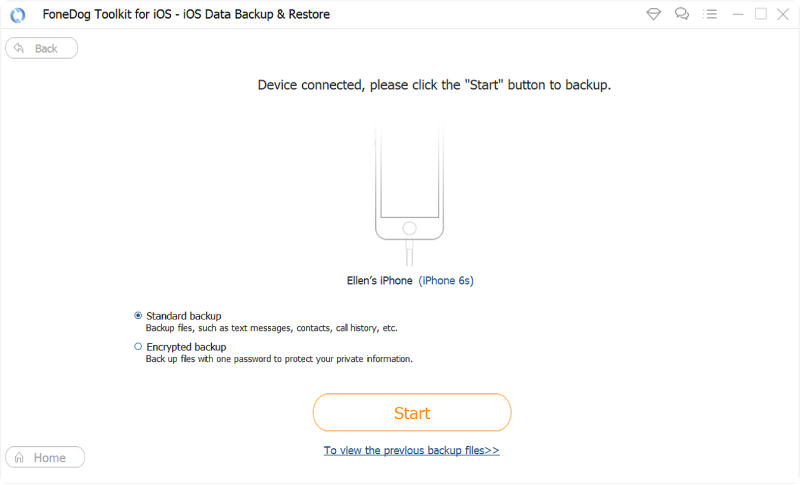
On the next page you will be pleased to find another awesome feature of the FoneDog Toolkit-iOS Data Backup and Restore.
You will be prompted that aside from creating a "standard backup" you can also choose to create an "encrypted backup" which is something quite useful to you if you have sensitive information that you would like to protect from prying eyes.
So meaning even if you have it stored on your PC it won't be easily accessed without knowing the passcode set up for it. Proceed to click on "Start" after you have made your selection for the backup mode.
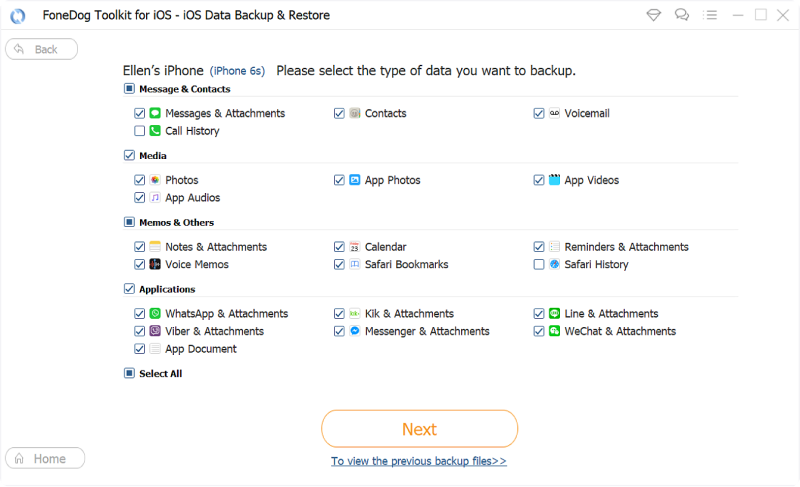
After clicking on "Start" the toolkit will proceed to show you the available files from your iPhone that can be backed up. These are categorized based on the type of data i.e. Messages, Photos, Contacts.
You can easily review it this way and make a selection of the ones that you would like to be able to access on your PC.
When you click on "Next" the toolkit will begin the scan of the files you have selected all you have to do now is wait.
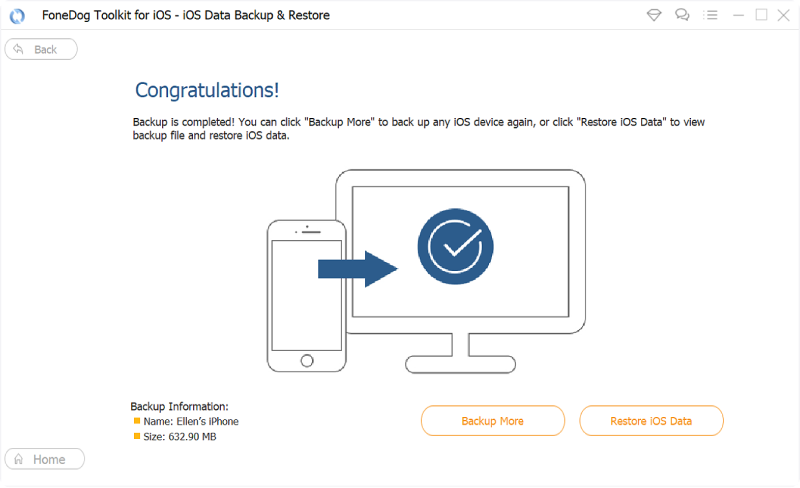
When it is done you will be given a prompt and you will see the details of the backup that was created (name and size are displayed).
You will now have the choice to either add more to your backup or have it transferred to your PC or on another device.

Now the next thing you would need to do to be able to keep a copy on your PC of the files from your iPhone is to use the "iOS Data Restore" feature of the toolkit.
You can either choose the action after you have finished the backup process by clicking on "Restore iOS Data" or go back to the main menu and look for it under the iOS Data Backup and Restore panel.
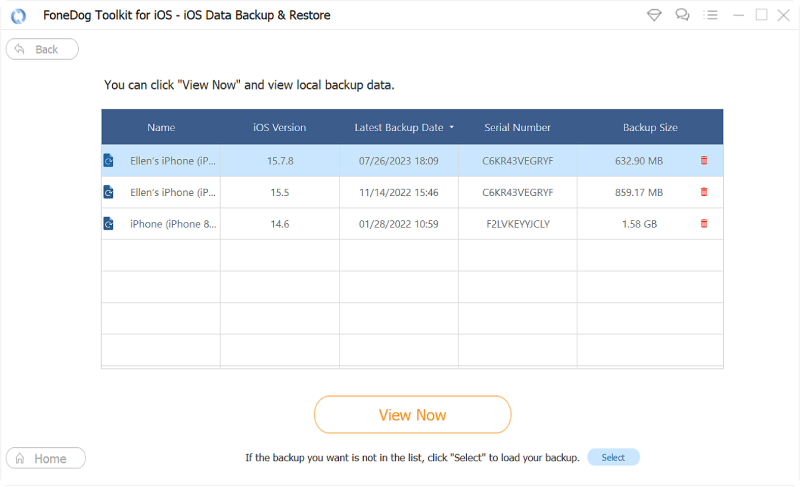
Step 1: You will be shown a list of available backup files created by the toolkit which is arranged by date (most recent shown first). Choose which one you need then click on "View Now".
Step 2: The toolkit will begin the scan of the contents. There's a progress bar showing on the screen so you can monitor how the scan is doing and you also have the option to either pause or stop it.
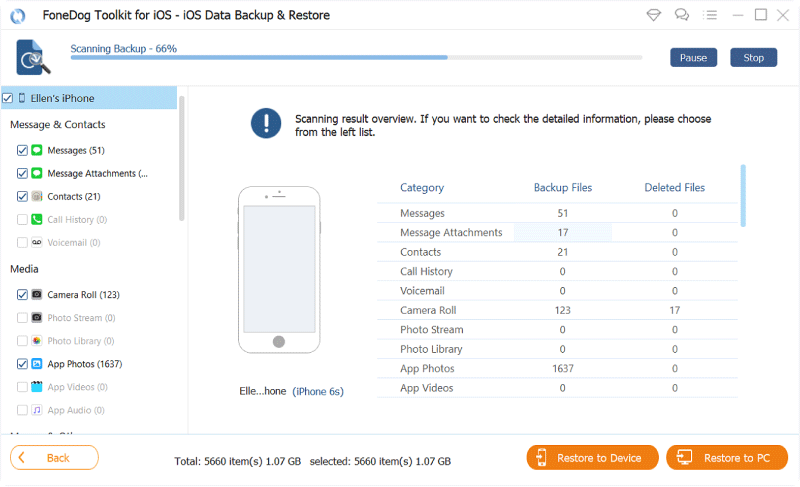
Step 3: When the scan has completed you will be given a more detailed preview of the contents of the backup file to make sure you check it before having it transferred.
It will give you the chance to further filter which ones you would like to keep on your PC. In this part of the process, you already have access to your iPhone files. Just click on "Restore to PC" when you're ready to proceed.
With the way Windows 10 was developed it is now actually packed with features that would work with people who have iPhones or other iDevices.
There's been a debate if it's really convenient and easy to integrate iOS with windows but no matter what bumps there are with the process it is still useful in managing stuff you would like linked to your windows PC.
There are apps on Windows 10 for music, messaging and even document sharing that can be used for both Android and iOS devices.
One thing that the FoneDog toolkit does and which always make it easy for iOS users is keeping files readily accessible and secure. You never know when you might have the need for such features.
People are always in search of something that would make things a whole lot more convenient in terms of managing data from their iPhones. With the FoneDog Toolkit-iOS Data Backup and Restore you have that and more. So what are you waiting for, download it today!
Leave a Comment
Comment
iOS Data Backup & Restore
Back up your data to PC and selectively restore iOS data from backups.
Free Download Free DownloadHot Articles
/
INTERESTINGDULL
/
SIMPLEDIFFICULT
Thank you! Here' re your choices:
Excellent
Rating: 4.5 / 5 (based on 91 ratings)