

By Adela D. Louie, Last updated: July 28, 2019
Before the time of technology, professionals and students take down their notes from meetings and from their studies through the use of a pen and paper. But with the use of our technology, making notes can be done by using either your laptop, computer, or even your mobile devices.
And with that, just like any other devices, Mac also comes with notes applications that every user can take advantage of. However, there aresome situations that notes on Mac just disappears for some reasons. This scenario can be frustrating especially if those notes contain important details and data.
So in this article, we are going to show you some ways on how you can recover Mac notes disappeared from your device most quickly and easily.
Tip: Download FoneDog Data Recovery to scan deleted/lost files from Mac's internal memory in one click. Feel free to click the button below to see if the lost notes are recoverable.
Data Recovery
Recover deleted image, document, audio and more files.
Get deleted data back from computer (including Recycle Bin) and hard drives.
Recover loss data caused by disk accident, operation system crushes and other reasons.
Free Download
Free Download

Part 1: Brief Introduction: What Are Notes for MacPart 2: How to Recover Mac Notes DisappearedPart 3: Bonus Tips to Recover Deleted Notes on iPhone, iPad or iPodPart 4: Conclusion
Notes app that you have on your Mac are one of the built-in applications that Apple offers. Through this app, you will be able to take down important details or some interesting information and you can have it reviewed on a later time.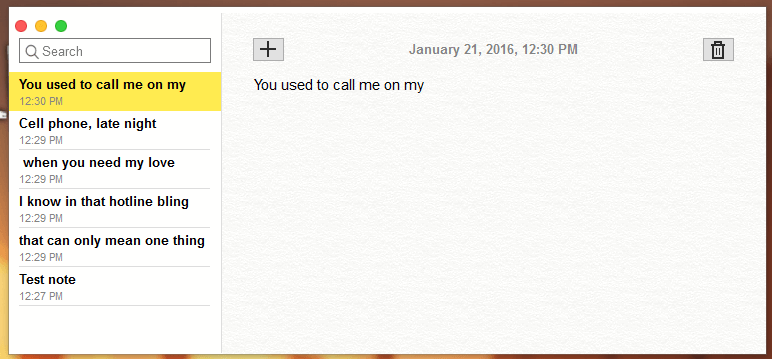
With this application, you cannot just merely input texts. You can also add up some pictures, a link to a movie or some other files for them to be saved on your Mac device. You can also have the freedom to add some contents and at the same time use some other apps on your Mac such as your web browser, photos, and your Maps.
With this app that Mac has, you can take down notes anywhere you go. You can sync your notes from your Mac device with your iPhone or your iPad device. So even if you leave your Mac at home, you can still have your notes and can access them through your other iOS devices.
And if in case you have some confidential information that you have on your notes, you can simply have them protected and secure by locking them up. And you can also add other people to your notes so that they can also have access to it.
With all the great features that this application has, it can be a huge problem when Mac notes disappeared for some reason. But do not worry because we have ways on how you can get them back.
There are situations you have made several notes for some reason so that you need to delete some of them from time to time to avoid your device from getting full and avoid any confusions on the other notes that you have.
However, it can also be a reason why you have accidentally deleted some of your important notes and you are not even aware on when you have deleted them. In this case, you have to get them back at all cost.
Therefore, we are going to show you several ways to recover your lost notes from Mac.
People Also Read: Why would notes disappear from your iOS devices?
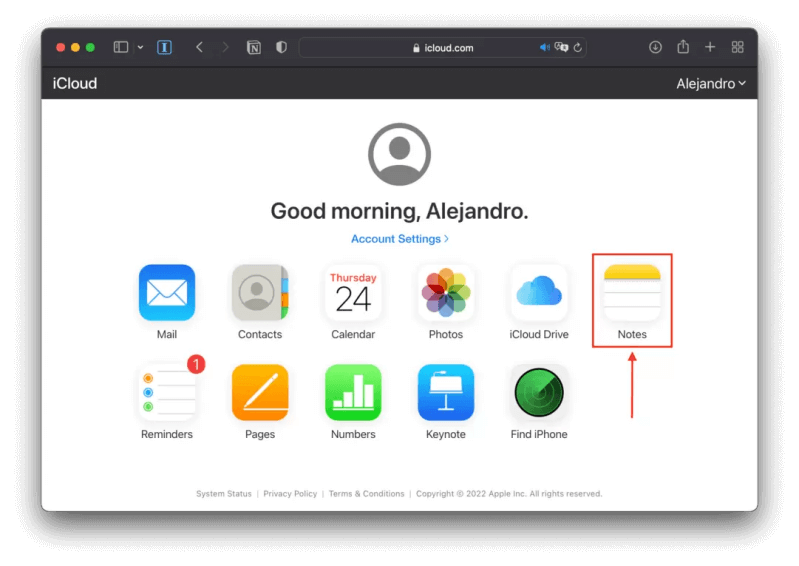
Using iCloud as a means of backing up your important data is a great idea. Another awesome way is to use iCloud to sync any Apple devices that you have. This way, you will also be able to recover your deleted notes from your Mac.
To recover disappeared Notes on Mac in iCloud, here are the steps:
Again, you should always make it a habit of backing up all of the important data on your computer. This way, you will be able to protect those data from danger such as deleting them accidentally or for some other reason.
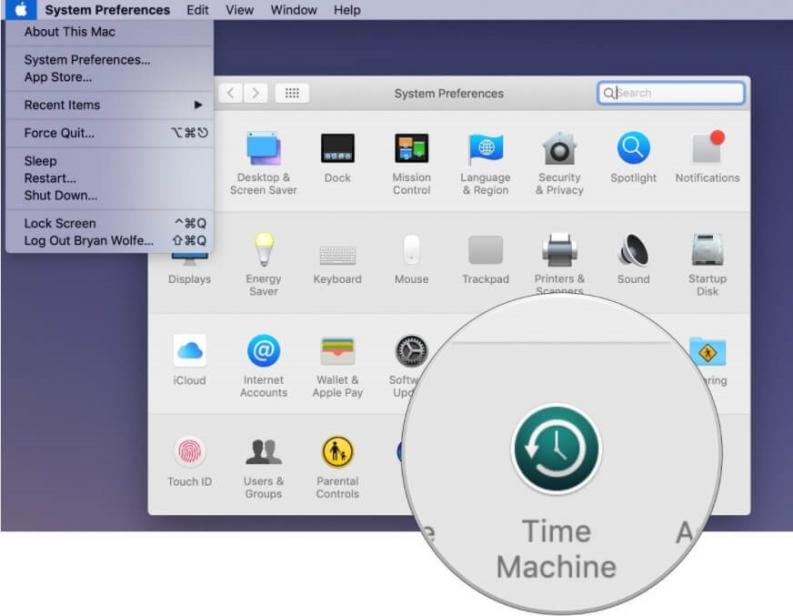
Since Apple knows the importance of backing up your data, they made sure to include a built-in backup program for its users to take advantage of. And this program is called Time Machine which you can use to backup and have your data protected.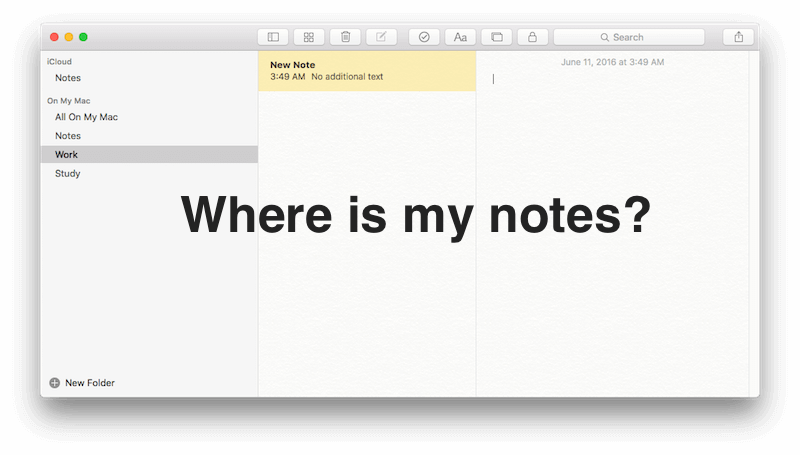
In this scenario of losing your Notes on your Mac, you can use Time Machine program to recover your files. This can only happen if you have backed them up on your Mac. Also, if you do not want your other data to be overwritten when doing the restore process, you can choose the notes and export them as a PDF file. Then, you can import them once that you are done with the restore process.
However, you have to keep in mind if you are going to use this solution to restore your lost notes, the recent notes on your Mac will be overwritten. These notes are located at this path folder: ~/Library/Containers/com.apple.notes/Data/Library/Notes/. Aside from this path folder, you can also look for your Notes at ~/Library/Group Containers under the group.com.apple.notes.folder.
REMINDER: To make sure that everything will be safe, consider copying all the files on both folders and transfer over to another location on your Mac.
So, to get started, follow the steps below to recover deleted Notes from your Mac using Time Machine.
Step 1: Make sure that you have copied all the notes that we have mentioned above.
Step 2: Plug in the storage device wherein contains your Time Machine backup and have it connected to your computer.
Step 3: Then, quit your Notes app and turn off your iCloud syncing for the Notes app. (You can refer to Solution #1, step 1 and 2 on how to do this.)
Step 4: After that, choose Time Machine icon located on your menu bar to launch the tool.
Step 5: Choose all of the data that you would like to recover and also, choose the folder that you would like to get back.
Step 6: Now, since you have your copy, simply replace the folders that you currently have with the folder that you got from your backup.
In case the Notes you lost on Mac are gone for a month now, you can still have them recovered using the Notes app. If you are going to look closely when you have accidentally deleted your Notes, it is not sent to your Trash Bin.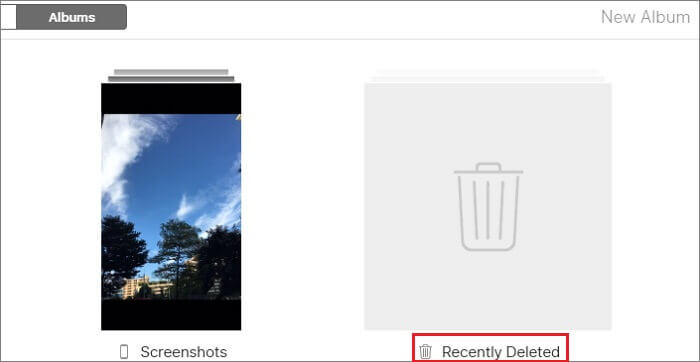
But instead, the notes that you have accidentally deleted on your Mac are kept in its very own version of the Trash Bin that you have. This folder is called the Recently Deleted Folder. Because in this folder, the files that you have deleted can be kept there within the 30 days. And because of that, you will be able to recover notes before they are deleted permanently on your Mac.
So, for you to be able to know how this method flows, here is a step by step guide that you can follow.
Step 1: Launch the Notes app on your Mac.
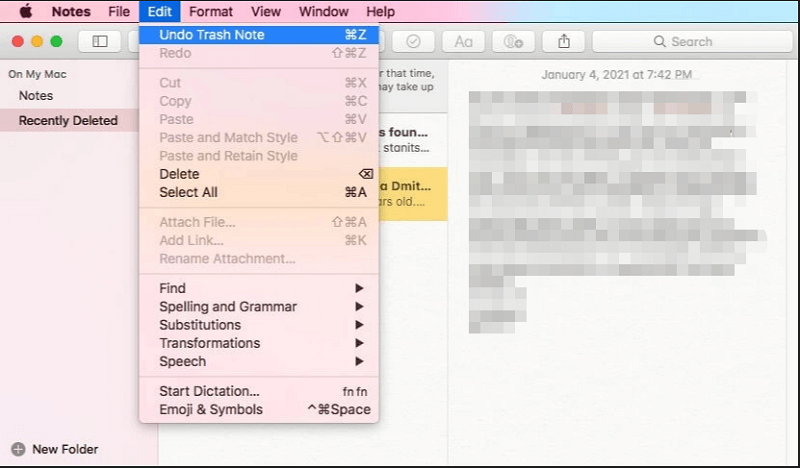
Step 2: After that, choose the Recently Deleted Folder located at the left menu hand of your Mac. Then you will be able to see Notes that you would like to get back at the right portion of your screen.
Step 3: From there, simply click on the Edit button located at the menu bar at the top of your screen,
Step 4: From the drop-down menu, simply choose “Undo Trash Note”. Or you can also right-click on the Note and then simply choose the folder wherein you want to save your file. Another way you can do this is to right-click on the note and then choose Move to and lastly, hit on Choose folder.
People Also ReadHow to Delete Movies from Your Mac
Now, since that we have talked about your notes that can be saved on your iCloud and that you can sync them on your other iOS devices, then you can also be able to have recovered to your iPhone or any iOS device that you have as long as you are using the same iCloud account with your Mac device.
And with that, there is another way for you to be able to recover it and that is by using a third-party tool which is called the FoneDog iOS Data Recovery.
This program will allow you to recover any of your lost data from your iOS device with the help of your iCloud backup. So a quick reminder, make sure that you were able to back up those Notes using your iCloud account. So with that, here is a brief method on how you can recover your deleted notes using the FoneDog iOS Data Recovery and your iCloud.
Step 1: Open Up the Program. On your Mac, launch the FoneDog iOS Data Recovery program. And from the recovery mode options on your screen, go ahead and simply click on “Recover from iCloud Backup File”.
Well protect customer right, you enjoy the 7-DAY money back guarantee!!!
No harm to have a try if there's a need!!!
↓↓↓↓↓↓↓↓↓
iOS Data Recovery
Recover photos, videos, contacts, messages, call logs, WhatsApp data, and more.
Recover data from iPhone, iTunes and iCloud.
Compatible with latest iPhone and iOS.
Free Download
Free Download

Step 2: Log in to Your iCloud Account. Then, you will be able to see the log in page of iCloud on your screen. From there, simply enter your Apple ID and your password to log in your iCloud account.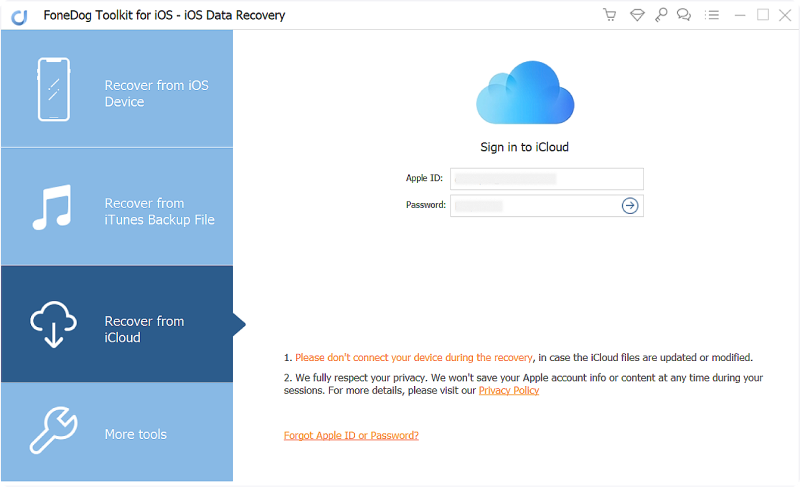
Step 3: Download Your iCloud Backup. Once that you are logged in to your iCloud account, you will then be able to see a list of your iCloud backup files. From there, choose the backup file where you have backed up your notes and then hit on the Download button.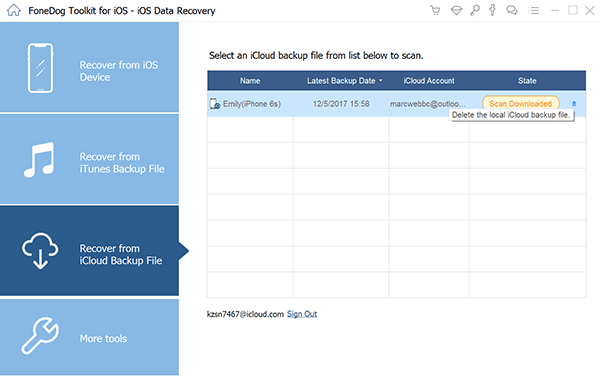
Step 4: Choose Notes. After that, the FoneDog iOS Data Recovery program will then start to scan your backup file. Once done, it will show you a list of file types that it can support. From there, go ahead and simply click on the Notes file.
Step 5: Recover Desired Notes File. After, you will see all the notes that you have on the right side of the program’s interface. From there you can go ahead and choose all of the data that you would like to get back. And once that you are finished choosing the files that you want, then you can go ahead and simply click on the Recover button.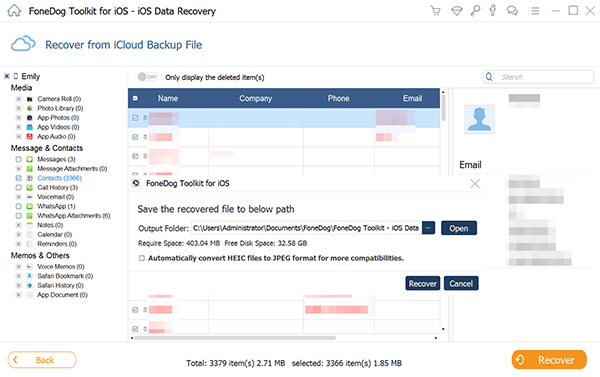
All of the files that you have chosen will all be recovered and will be saved on a specific folder on your computer.
If you are going to think about it, getting back your notes that were deleted from your Mac is easy. All you need to do is to choose any of the solutions that we have provided to you above. And from there, simply follow all the steps carefully and in no time, you will be able to get back those deleted notes from your Mac.
All the problems come with a solution that you can apply. All you need to have is the right gear. So with that, you have to make sure that you back up all of the important data from your device. This way, you will be able to have them back in case something happens that may lead them to be deleted from your device.
Leave a Comment
Comment
Hot Articles
/
INTERESTINGDULL
/
SIMPLEDIFFICULT
Thank you! Here' re your choices:
Excellent
Rating: 3.0 / 5 (based on 2 ratings)