FoneDog Screen Recorder
FoneDog Screen Recorder
Special Offer
Special Offer


By Adela D. Louie, Last updated: December 16, 2022
Whereas many users look for ways to actually recover deleted files, there may be times when you really prefer to permanently remove but also consider how to delete iPad data permanently.
This is critical to understand whereas when you select that delete button for everything, the records disappear from perception but remain throughout the space of your iPad, but rather thus removed data could be quickly recovered using just a few approaches.
That's because whenever you delete data, everything just goes directly into file storage and remains in memory. Users could perhaps quickly access it once it is within the latter location, especially within your iPad.
Part #1: Why It Is Important to Delete iPad Data Permanently?Part #2: Permanently Delete iPad Data in One-Snap – FoneDog iPhone CleanerPart #3: Brief Common Guide on How to Delete iPad Data PermanentlyPart #4: Conclusion
Why is it necessary to delete your iPhone data or your iPad and other Apple devices, and have knowledge about how to delete iPad data permanently? Though since you don't want to showcase anything from your private details with anybody, right? Because once you offer your iPad without totally discarding those needed details, it would be like giving a piece of yourself to anyone in the neighborhood.
If you possess an iPad, everything just contains a piece of you in the form of pictures, clips, contact details, files, phone records, and perhaps even account information. As either a result, the above vital information should have been entirely removed before somebody else can use them against you then you become a victim of data theft.
Even though Apple provides optimal protection to all of its users, this is still preferable to take precautionary steps instead of facing the consequences later. To safeguard yourself from this potential problem, we would then show you how to efficiently and rapidly delete most data onto your iPad.
But even so, before you can get too elated about deleting all your personal data from your devices, you should make a backup first. Such backups enable you to rebuild your preferences menu, which includes applications, contact information, pictures, and clips, to a specific device as lengthy as you had the same Apple ID, then you could still easily retrieve those files through iTunes as well as iCloud.
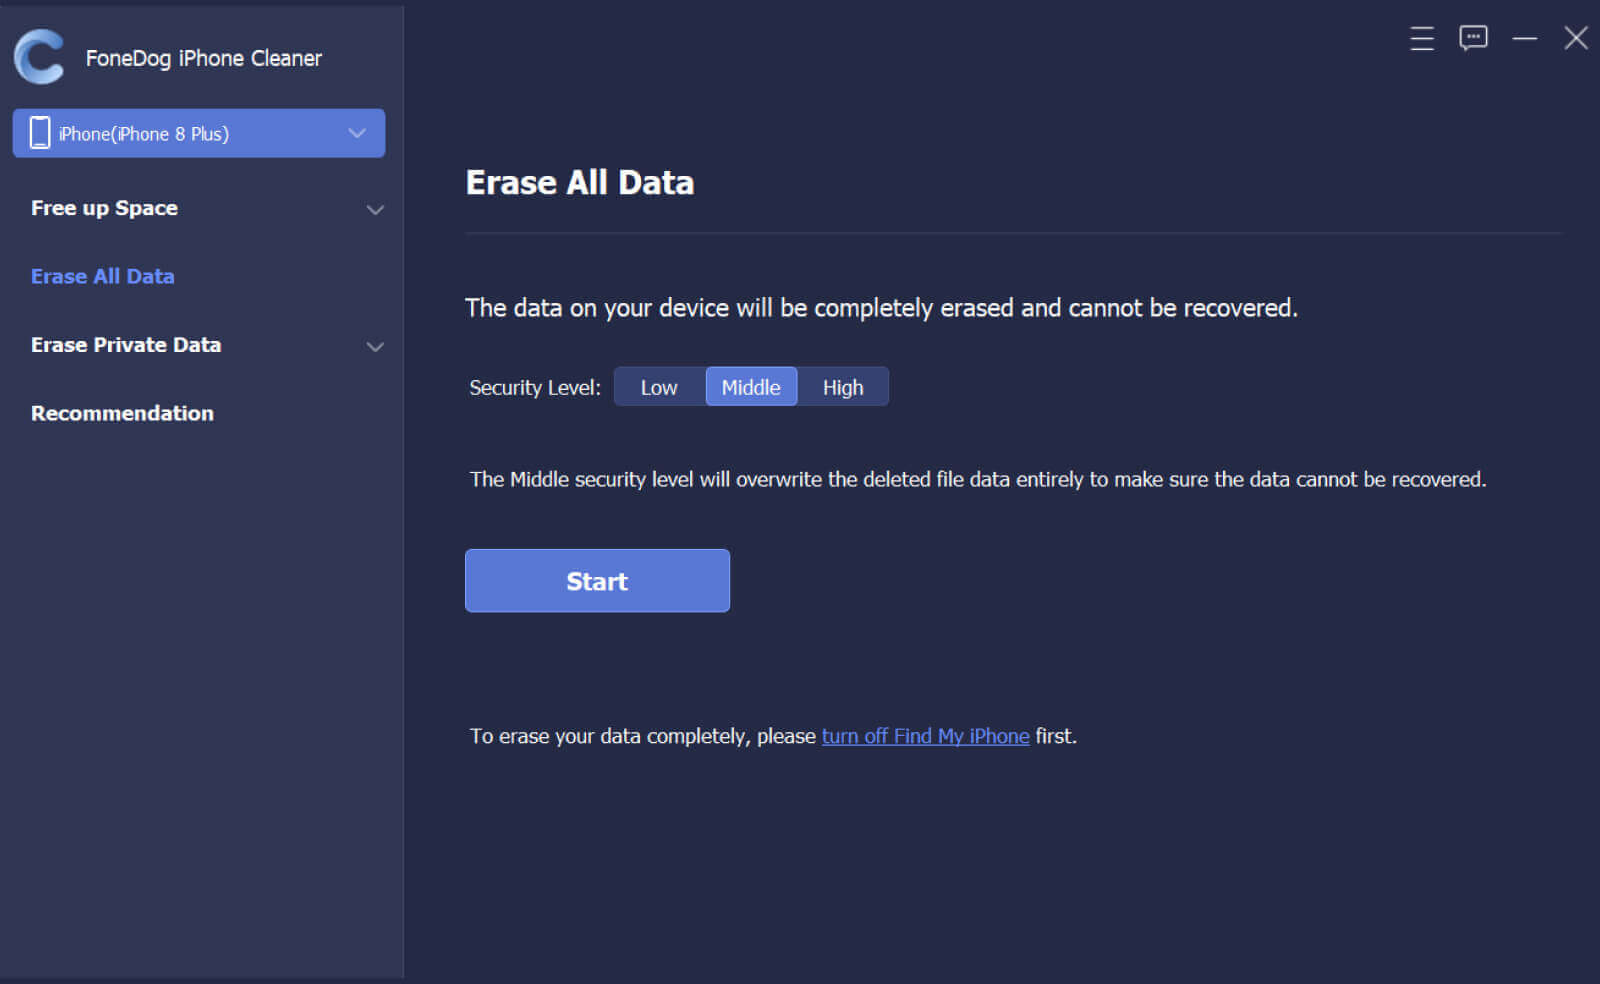
In this part, before you proceed with the actual manual procedure on how to delete iPad data permanently, we would likely introduce further the one snap tool you make use of in permanently deleting those iPad data within your device which is the FoneDog iPhone Cleaner.
This iPhone-cleaning application does have many features you could make use of which thus include restoring, backups, and permanently one snap eliminating those junk data that has been clogging your devices.
FoneDog iPhone Cleaner has been always their functionality. Instead using of the time-energy-consuming process, this will then help you to delete one snap away all those data you wanted to be deleted permanently. It will not then make you choose what to delete but rather the tool will do it for you. Overall, this tool really is instant and smart in what it does which wipes out data with no chance of restoring those.
To immediately start with the actual procedure, make sure that you have installed and also download the FoneDog iPhone Cleaner, this tool can be obtained on their official website. Whenever you have then acquired the tool app you could proceed with the step-by-step procedure provided below:
Apple had already linked your Apple ID to various mobile applications something which you have used frequently. Those that pretty much invented the functionality of creating a single account which could be used for a variety of mobile operations.
Of whenever to make use for almost any App Store transactions or maybe just a personal picture you've been trying to keep somewhere within your machine; several of these data also seem to be critical to your individual privacy, but whenever you end up selling your gadget, very often take into account deleting anything wipe down.
Look up out these distinct methods for deleting all data on an iPad:
To deal with the hassle of working a full day trying to delete all or most of the data from your iPad, you should take a glance for a quick time to go about it. Initially, you must log out from each and every accounts linked affiliated further with iPad.

Make absolutely sure to disable those passcode, keys, and perhaps even fingerprint scanners onto your gadget. You must deactivate the pairing seen between gadgets if you already own an Apple Watch.
When you've already signed out of all the linked accounts, you'll really ought to delete your iPad data. Here's how to delete iPad data permanently, follow the step by step below:

People Also Read[2024 Updated] How to Get Rid of Bookmarks on iPad’s Sidebar: Your Ultimate GuideHow to Clear Browsing History on iPad: Your Ultimate Guide [2024 Updated]
To conclude, it is important to have regularly check on data and backup those. Since data could be sometimes overrated within our device and can cause problems make sure to know how to delete iPad data permanently.
Having a great outlined guide you will be able to delete those data you desired to discard permanently and fully. Also, if there are instances that you don’t want to do the manual step by step you could always rely on the FoneDog iPhone Cleaner.
This companion of yours will be surely help you wiping out each and every data you wanted to be out of your iPad, without any restoration of those. We hope that this article overall help you towards deleting iPad data. Hope you a have nice and amazing day ahead.
Leave a Comment
Comment

Tech Website Writing /Content Optimization
Singing, smiling, surprising every day!
So as a technical writer, it is my duty to gather effective and reliable solutions to answer questions on how to deal with the issues they are having with their devices.
Hot Articles
 /
/
INTERESTINGDULL
/
SIMPLEDIFFICULT
Thank you! Here' re your choices:
Excellent
Rating: 4.6 / 5 (based on 74 ratings)