FoneDog Screen Recorder
FoneDog Screen Recorder
Special Offer
Special Offer


By Nathan E. Malpass, Last updated: April 14, 2025
In the era of smartphones, our mobile devices have become repositories of cherished memories captured through photos and videos. However, with limited storage space on iPhones, transferring your photos to your computer is essential to free up space and ensure the safety of your precious memories. How to transfer iPhone photos to computer? One of the most convenient and versatile methods is through Google Drive.
While our iPhones offer convenient storage for these memories, they can quickly run out of space, causing us to miss out on new photo opportunities. Plus, relying solely on your iPhone to safeguard your photos is risky; a lost or damaged device can result in the irreplaceable loss of these precious memories.
To avoid such scenarios, it's essential to regularly transfer your iPhone photos to your computer. This not only frees up space on your device but also creates a secure backup of your images.
In this article, we'll explore some hassle-free methods to help you transfer iPhone photos to your computer seamlessly. Whether you're using a Mac or a PC, we've got you covered with user-friendly techniques that will ensure your memories are safely stored and easily accessible whenever you need them.
Part 1. 4 Ways to Transfer iPhone Photos to Your ComputerPart 2. The Best Way to Transfer iPhone Photos to Your ComputerPart 3. Conclusion
In the era of smartphones, our mobile devices have become repositories of cherished memories captured through photos and videos. However, with limited storage space on iPhones, transferring your photos to your computer is essential to free up space and ensure the safety of your precious memories. How to transfer iPhone photos to computer? One of the most convenient and versatile methods is through Google Drive.
Step 1: Install Google Drive
If you haven't already, download and install the Google Drive app on your iPhone from the App Store.
Step 2: Sign In or Create an Account
Launch the Google Drive app and sign in with your Google account credentials. If you don't have an account, you can create one for free.
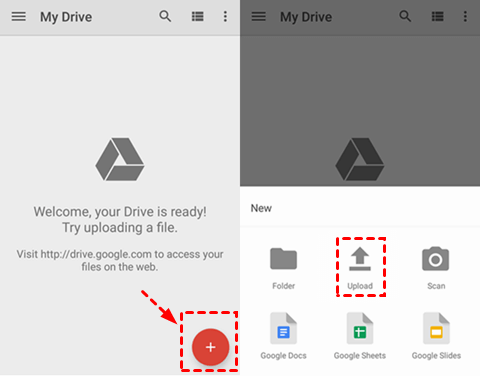
Step 3: Upload Photos
Step 4: Access on Your Computer
Now, on your Mac or PC:
Step 5: Download Photos to Your Computer
Google Drive offers a seamless and cross-platform solution for transferring iPhone photos to both Mac and PC computers. It provides a secure cloud-based storage option, ensuring that your cherished memories are accessible and backed up. Whether you're using a Mac or a PC, Google Drive simplifies the process of preserving your photos and freeing up space on your iPhone.
If you're a Mac user, one of the most convenient and lightning-fast ways to transfer iPhone photos to computer is by utilizing Apple's built-in feature, AirDrop. This wireless method allows you to seamlessly move photos from your iPhone to your Mac. Here's how to do it:
Step 1: Ensure Compatibility
Before proceeding, make sure that your Mac and iPhone are both compatible with AirDrop. Your Mac should be running macOS X Yosemite (10.10) or later, and your iPhone should be running iOS 7 or later.
Step 2: Enable AirDrop on Your iPhone
Step 3: Enable AirDrop on Your Mac

Step 4: Transfer Photos
Step 5: Accept the Transfer on Your Mac
On your Mac, you'll receive a notification asking if you want to accept the incoming files. Click "Accept" to start the transfer.
Step 6: Check Your Downloads
The transferred photos will be saved to your Mac's Downloads folder by default. You can access them by opening the Finder, selecting "Go" from the menu bar, and choosing "Downloads."
AirDrop is not only fast and efficient but also ensures high-quality photo transfers. It's an excellent method for Mac users to transfer iPhone photos seamlessly without the need for cables or third-party software.
Also, leveraging Apple's iCloud can be a convenient and automated way to transfer iPhone photos to computer. iCloud Sync seamlessly synchronizes your photos between your iPhone and your Mac, ensuring that your pictures are readily accessible on both devices. Here's how to set it up:
Step 1: Ensure iCloud Photo Library is Enabled
Step 2: Sign in to iCloud on Your Mac
Step 3: Enable iCloud Photo Library on Your Mac
Step 4: Wait for Synchronization
Once you've enabled iCloud Photos on both your iPhone and Mac, your photos will start synchronizing automatically. Depending on the number of photos and your internet connection speed, this process may take some time.
Step 5: Access Your Photos on Your Mac
Once synchronization is complete, your iPhone photos will be available in the Photos app on your Mac. You can organize, edit, and view your photos as you would with any other photos stored on your Mac.
Step 6: Backup Your Photos (Optional)
To ensure that your photos are permanently stored on your Mac and not just in the cloud, consider periodically exporting or backing up your iCloud Photos to an external drive.
Using iCloud Sync simplifies the process of transferring iPhone photos to your Mac by automating the synchronization process. It's an excellent choice for those who want a hassle-free and integrated solution for managing their photos across their Apple devices.
Another versatile way to transfer iPhone photos to computer, regardless of whether you're using a Mac or PC, is through popular messaging apps like WhatsApp or Telegram. These apps provide a convenient platform for sharing photos between your iPhone and computer. Here's how to do it:
Step 1: Install the Messaging App
If you haven't already, download and install the messaging app of your choice on your iPhone from the App Store. WhatsApp and Telegram are popular options, but you can use any messaging app that supports photo sharing.
Step 2: Create an Account
Launch the messaging app and create an account if you don't have one. You may need to verify your phone number to set up your account.
Step 3: Start a Chat with Yourself
To transfer photos, you'll essentially be sending them from your iPhone to yourself on the messaging app:
Step 4: Send Photos
Step 5: Access Photos on Your Computer
Now, on your Mac or PC:
Step 6: Download Photos to Your Computer
In the chat with yourself on your computer, you'll find the photos you sent from your iPhone. Simply click on each photo to download it to your computer.
Step 7: Organize and Save
Once downloaded, you can organize and save the photos to your preferred location on your computer.
Using messaging apps to transfer iPhone photos to your computer offers a straightforward and cross-platform solution. It doesn't require additional software or cloud storage accounts, making it a quick and accessible method for sharing your photos. Whether you're using a Mac or PC, this method allows you to easily move your pictures to your computer for safekeeping or further editing.
While there are various methods available to transfer iPhone photos to computer, some individuals prefer a dedicated software solution that offers both simplicity and versatility. One such tool that stands out is the iPhone 15 supported FoneDog Phone Transfer. In this section, we will explore why this tool is considered one of the best for transferring iPhone photos to your computer.
And aside from photos, it can also help you in transferring other data from your smartphone devices such as music, messages, videos, and your contacts. In this section, we'll introduce some of the key features that make FoneDog Phone Transfer an excellent choice:
Phone Transfer
Transfer files among iOS, Android and Windows PC.
Transfer and backup text messages, contacts, photos, video, music on computer easily.
Fully compatible with the latest iOS and Android.
Free Download

Using this best photo transfer app to move iPhone photos is straightforward:
Step 1: Download and Install
Download and install FoneDog Phone Transfer Tool on your Mac or PC from the official website.
Step 2: Launch the Tool
Launch the program after installation and connect your iPhone to your computer using a USB cable.
Step 3: Select Photos
From the main menu, choose "Phone to PC Transfer" or a similar option, depending on the tool's interface.

Step 4: Choose Photos
Select the photos you want to transfer from your iPhone to your computer. You can also choose the destination folder on your computer.

Step 5: Start the Transfer
Click the "Start Transfer" button to initiate the transfer process. The tool will begin copying your selected photos to your computer.
Step 6: Complete Transfer
Wait for the transfer to complete. Once finished, you'll find your iPhone photos safely stored on your computer.
FoneDog Phone Transfer Tool simplifies the process of transferring iPhone photos to your computer. Its user-friendly interface, compatibility with both Mac and PC, and efficient transfer capabilities make it an excellent choice for individuals who want a reliable and straightforward solution for managing their iPhone photos on their computer.
Transferring your cherished iPhone photos to your computer is not only a practical step to free up space on your device but also a vital measure to safeguard your precious memories. In this article, we've explored various methods to achieve this, ensuring you can choose the one that best suits your needs and preferences.
Ultimately, the choice of method depends on your specific preferences, the devices you use, and your workflow. Whether you opt for the simplicity of cloud storage, the immediacy of wireless transfers, or the versatility of software tools, the goal remains the same: to ensure your iPhone photos are safely stored on your computer, ready to be enjoyed, shared, or backed up as needed.
By following the steps outlined in this article, you can effortlessly manage your iPhone photos and maintain a secure archive of your most cherished memories, all while keeping your device's storage clutter-free.
Leave a Comment
Comment

iPhone/Android Devices’ Maintenance Expert
Staying home, listening to music, writing tech articles
Many people asked me to repair their mobile phones so I have a lot of experience in mobile phone repair, and I know a lot about Android or Apple phones.
Phone Transfer
Transfer data from iPhone, Android, iOS, and Computer to Anywhere without any loss with FoneDog Phone Transfer. Such as photo, messages, contacts, music, etc.
Free DownloadHot Articles
 /
/
INTERESTINGDULL
/
SIMPLEDIFFICULT
Thank you! Here' re your choices:
Excellent
Rating: 4.5 / 5 (based on 93 ratings)