By Adela D. Louie, Last updated: June 13, 2024
This is the ultimate guide to recording lectures effectively. In this article, we share the best way to record lectures for students and help you record lectures easily. Whether you are a student or a teacher, this guide will help you easily record everything you want for future use!
Part 1. Methods for Recording Lectures for StudentsPart 2. Best Way to Record Lecture for StudentsPart 3. Additional Techniques for Enhanced LearningConclusion
Part 1. Methods for Recording Lectures for Students
Recording lectures offers students flexibility, enabling them to watch videos at their convenience, in bite-sized portions. This method allows on-demand access for review or rewatching.
Here's are some methods that any readers or any professional may use to record letures for their students:
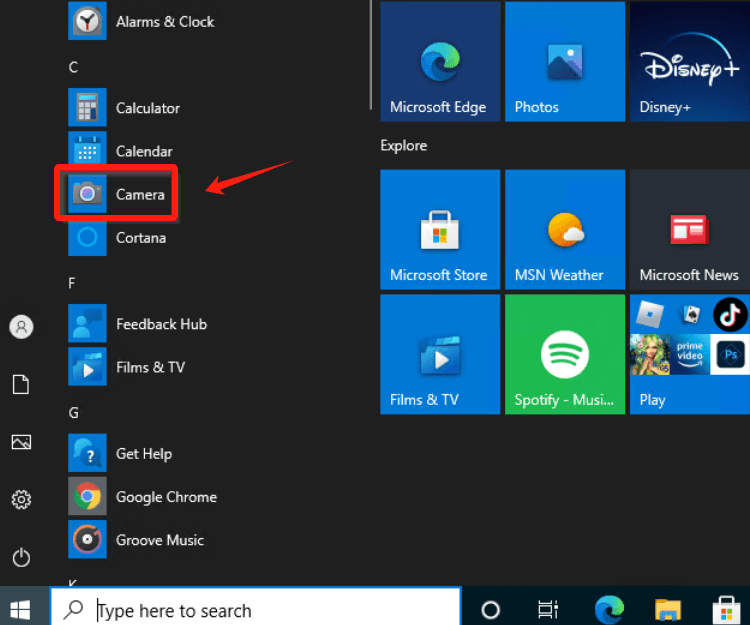
Method 1. Using a Webcam or Built-in Camera:
- Begin by open your webcam or integrated camera available on your laptop or your desktop computer.
- Ensure that the environment is well-lit as well as free from any distracting noises for optimal recording conditions.
- Launch the appropriate video recording software, such as built-in webcam on Windows, Zoom, OBS Studio, or even such as using QuickTime, based on your preferences or even accessibility.
- Modify the camera settings to obtain the desired resolution and framing that best suits your recording needs.
- Before you begin recording, you can perform a thorough test to determine the quality of the audio and video components.
- Initiate the recording process.
Method 2. Using Presentation Software:
- Begin by organizing your lecture materials, which may include slides, documents, or perhaps any relevant content.
- Use presentation software such as PowerPoint, Google Slides, or Keynote to structure and create your visual aids or content for the lecture.
- Launch a screen recording application like Camtasia, ScreenFlow, or OBS Studio that suits your preferences and requirements.
- Choose the specific area of the screen you intend to capture for the recording, whether it's the entire screen or a particular application/window.
- Configure the settings for audio input, which then ensuring the microphone is correctly set up and functioning. Take the time to test the recording settings for clarity and quality.
- Initiate the recording process and navigate through your prepared presentation, delivering the lecture content while ensuring synchronization between your speech and the visual aids.
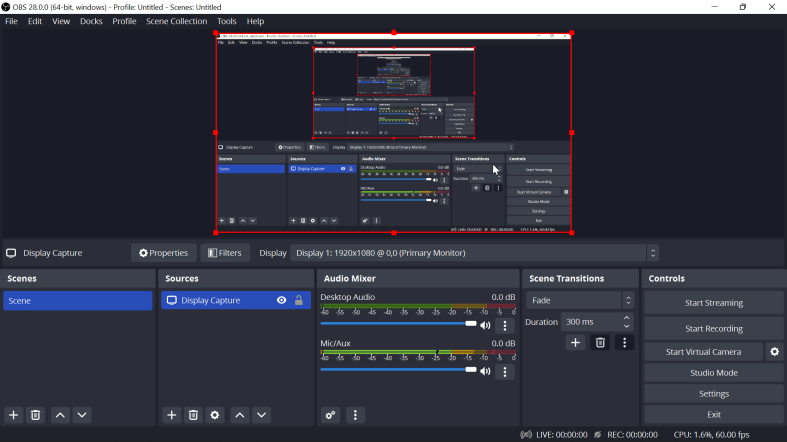
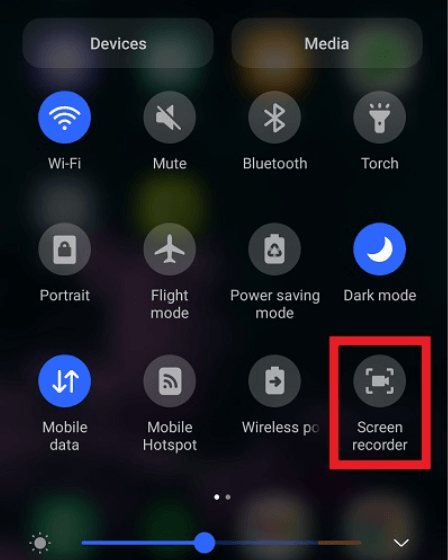
Method 3. Mobile Device Recording:
- Position your smartphone or tablet securely in a stable manner, ensuring it is placed in a reliable position for recording.
- Guarantee that the surroundings have adequate lighting as well as the minimal background noise to create an optimal recording environment
- Access either the built-in camera application right on your device. Go to the Control Center and choose "Screen Recorder".
Method 4. Document Camera or Visual Demonstrations:
- Place a document camera or such webcam to effectively capture physical materials or live demonstrations that are integral to your presentation.
- Organize and place the items or materials you want to present, making sure they are clearly visible and easy for the audience to understand.
- Before recording, you can simply perform a test to evaluate and ensure the quality of the camera visuals and audio output to ensure a seamless presentation.
- Start the recording process while explaining and demonstrating the materials or concepts you have arranged, maintaining clear and concise expression throughout the presentation.
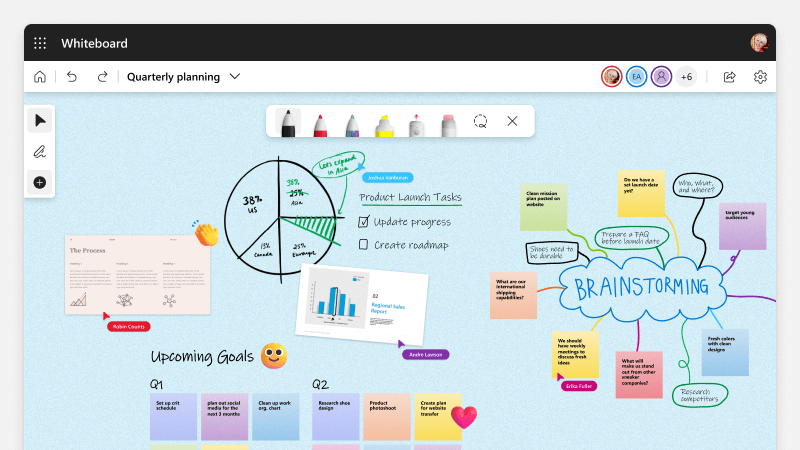
Method 5. Interactive Whiteboard or Tablet:
- Use an interactive whiteboard or connect a drawing tablet to your computer system to conduct presentations.
- Access whiteboard software or drawing applications with recording capabilities, such as Explain Everything or Microsoft Whiteboard, to simplify the explanation and recording process.
- Prepare writing tools and configure the canvas in the software or application, ensuring they are set up according to your preferences and requirements.
- Ensure the functionality and quality of both the audio input and pen responsiveness on the tablet or whiteboard software.
- Initiate the recording feature and commence your lecture delivery, simultaneously illustrating and elaborating on concepts using the interactive whiteboard or table.
Regardless of the method chosen, it's important to:
- Check equipment and settings beforehand.
- Ensure a quiet and well-lit environment.
- Practice your delivery and pacing.
- Consider using a script or outline to maintain coherence.
- Review the recording afterward to ensure quality and content accuracy before sharing it with students.
Part 2. Best Way to Record Lecture for Students
FoneDog Screen Recorder is an excellent tool for students who want to record and review lectures effectively. This user-friendly software provides a comprehensive solution for recording lectures, offering a range of customized features to facilitate the recording experience. Its versatility and ease of use make it an excellent choice for students looking for a reliable way to record lectures.
 Free Download
For Windows
 Free Download
For normal Macs
 Free Download
For M1, M2, M3
Features of FoneDog Screen Recorder:
- Flexible Recording Options: It allows users to record the entire screen or select a specific area to capture, providing flexibility to focus on the essential elements of the lecture.
- Multiple Formats and Resolutions: It supports various video formats and resolutions, enabling students to choose the most suitable settings for their recording needs, ensuring high-quality playback.
- Audio Recording: The software offers simultaneous audio recording capabilities, allowing users to capture both system sound and microphone input, ensuring clear and synchronized audio with the recorded video.
- Annotation Tools: It comes equipped with annotation tools, facilitating on-screen markup during recordings, making it easier to highlight key points or emphasize critical information during the lecture.
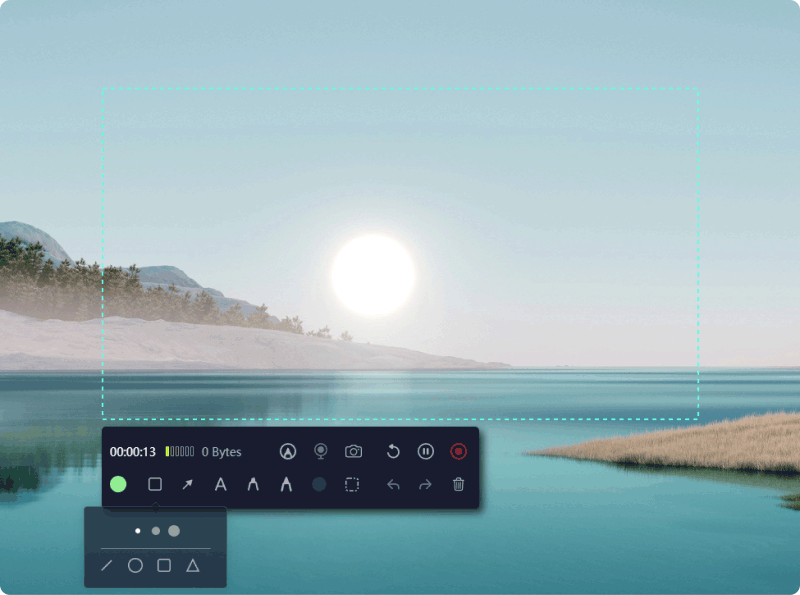
Using FoneDog Screen Recorder to Record Video Lectures:
- Begin by downloading and installing FoneDog Screen Recorder on your computer. Once installed, launch the application to access its user-friendly interface.
- Choose "Video Recorder". Configure the recording settings according to your preferences. Choose the desired recording area, video format, resolution, and audio input sources for your lecture capture.
- Organize lecture materials such as slides, documents, or any necessary visual aids to supplement your recording.
- Select the recording area and click on the "Start Recording" button to start capturing the lecture. Simultaneously, deliver your lecture content while navigating through the material you've prepared.
- Use the annotation tools to emphasize critical points or illustrate concepts during the recording.
- After concluding the lecture, stop the recording, review the captured content, and save the video file in the preferred format and location on your device for future reference or sharing with peers.
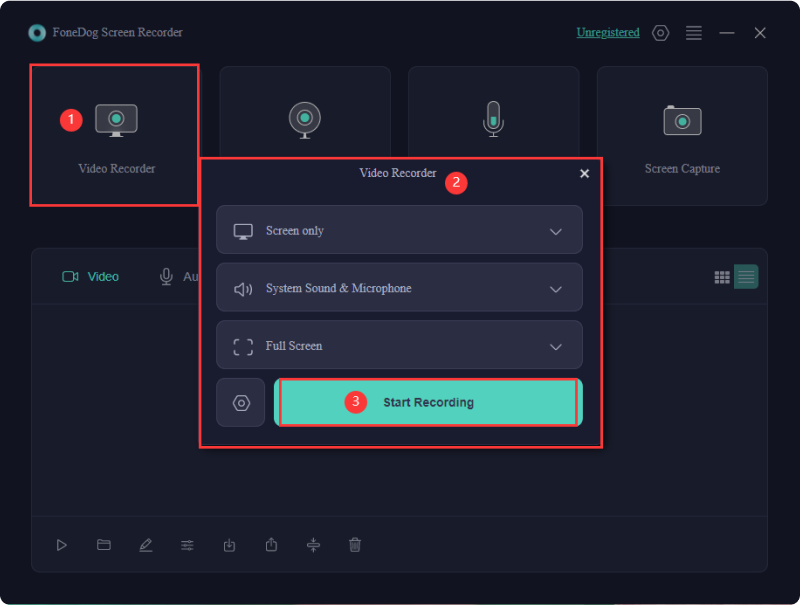
Its intuitive interface and robust features make it an ideal choice for students looking to effectively record, review, and enhance their learning experiences by capturing essential lecture content.
Part 3. Additional Techniques for Enhanced Learning
Enhanced learning involves employing additional techniques beyond basic lecture recording to optimize comprehension, engagement, and retention of educational content. Here are various methods to enhance learning:
- Interactive Quizzes and Assessments: Incorporate quizzes, polls, or interactive assessments within recorded lectures. Platforms like Kahoot!, Quizlet, or Google Forms engage students, reinforce learning, and provide immediate feedback.
- Virtual Labs or Simulations: Introduce virtual lab sessions or simulations that allow students to practically apply concepts taught in lectures, fostering a hands-on learning experience.
- Synchronous Discussion Sessions: Supplement recorded lectures with live Q&A sessions or synchronous discussions facilitated by instructors, providing a platform for clarification and deeper exploration of lecture content.
- Mind Mapping or Conceptual Visualization: Encourage students to create mind maps, concept maps, or visual diagrams summarizing lecture content, aiding in organizing information and reinforcing connections between concepts.
By combining these additional techniques with recorded lectures, educators can create a more dynamic and engaging learning experience, catering to diverse learning styles while maximizing comprehension and retention of course material.
People Also ReadTop 11 Presentation Recording Software (with Audio)14 Best Webcam Recording Software for All Devices (2024)
Conclusion
knwo what is the best way to record lectures for students offers flexibility, aiding comprehension and review. We indeed encourage students to explore varied recording methods that suit their learning styles. Embrace these tools for personalized learning, maximizing understanding and optimizing study practices. Happy Reading!


Free Download
For Windows
Free Download
For normal Macs
Free Download
For M1, M2, M3


/
/