FoneDog Screen Recorder
FoneDog Screen Recorder
Special Offer
Special Offer


By Adela D. Louie, Last updated: July 29, 2024
Designed by Apple Inc., Facetime has been one of the most preferred video calling apps by iOS device users. Communicating with the people you love regardless of their locations should be simple and easy. Unlike other apps, it is guaranteed that the video call quality is good. Users can utilize this app as long as the internet or data connection is stable and good.
Just in case you wish to take a Facetime screenshot while on a call to keep a remembrance, you can do that as well! If you have been thinking about the process, don’t worry, you’ll see the guide that you need as you read this post’s content.
Part 1. How to Take a Facetime Screenshot on iPhonesPart 2. How to Take a Facetime Screenshot on Mac PCsPart 3. Conclusion
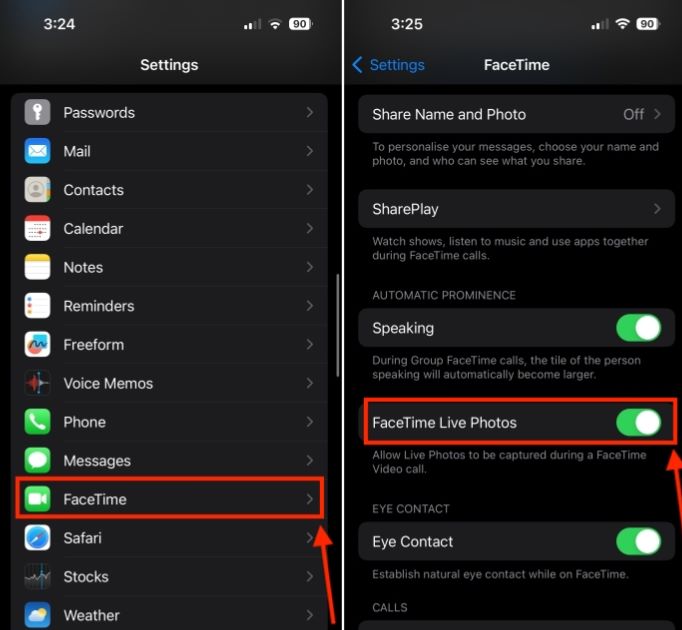
One good thing about iOS devices is that you can join a conversation while connected to the internet. The default video calling app for iOS devices is Facetime. If you’d like to still create memories while on a video call with someone, considering to take Facetime screenshots or screen record Facetime could be a good method. If you aren’t aware, you can switch on the Facetime Live Photos feature on “Settings” to use a special image format.
Now, to finally be able to capture screenshots while you’re on Facetime call using your iPhone, here is what you need to follow.
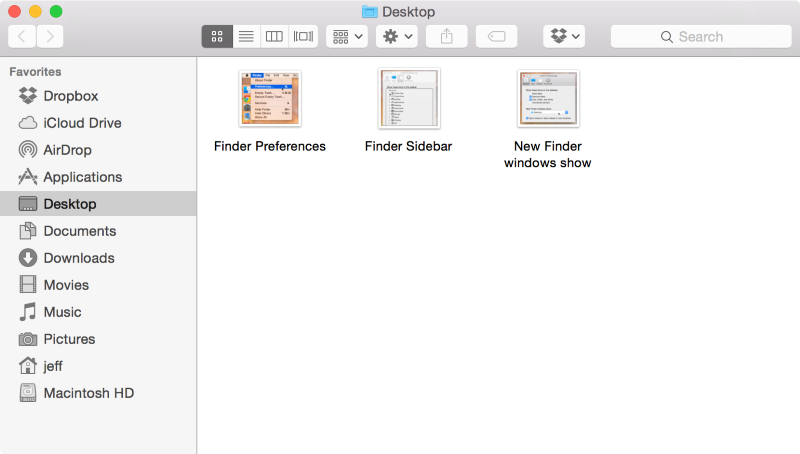
Apart from sharing how simple it is to capture Facetime screenshots if you’re using an iPhone, we’ll now be sharing the detailed procedure of how it can be done if you are using a Mac computer. Facetime actually has a desktop version.
Thus, those who find it needed and easier to use the desktop version over the mobile app can turn to using their Mac PCs. There are two methods of how you can capture an image while using the Facetime desktop version – the use of keyboard shortcuts or utilizing a third-party software app. Both of these will be shared in this section of the article.
If you just want to take a Facetime screenshot without editing it, you can just turn to using keyboard hotkeys. You can freely capture the whole screen if you wish to, the Facetime window, or just a certain section that you like. You may also refer to the instructions listed below.
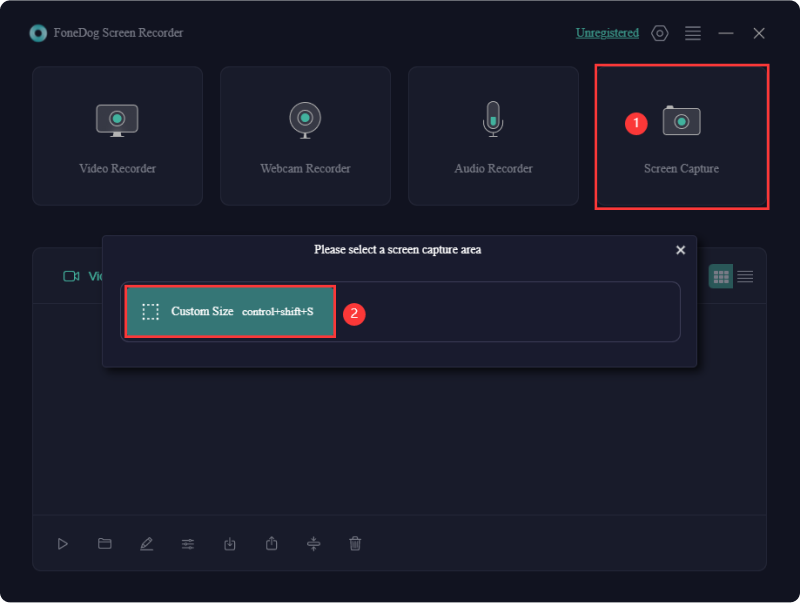
The use of the previous method to capture Facetime screenshots is totally effective, convenient, and simple. However, it lacks advanced tools. If you want to capture screenshots while on a Facetime call and have them edited or modified, choosing a reliable third-party software app would be the best move. Among the many available on the web, if you aren’t sure what to use, we suggest relying on FoneDog Screen Recorder.
The abovementioned is capable of letting the users record their screen activities, webcams, and even sounds while having the flexibility to define their recording settings. Of course, it also has the “Screen Capture” feature that can be used to take not only Facetime screenshots but all other snapshots as wished. It can also be used to record Facetime call with audio.
![]() Free Download
For Windows
Free Download
For Windows
![]() Free Download
For normal Macs
Free Download
For normal Macs
![]() Free Download
For M1, M2, M3
Free Download
For M1, M2, M3
Advanced tools for editing and annotation are readily available when needed. One can also be assured that the output files from this tool are high quality and with no watermarks! It’s also worth mentioning that apart from supporting Mac OS, this also works pretty well on Windows PCs. Plus, its interface is intuitive and too simple so first time users won’t find it hard to use.
Let’s see how to capture Facetime screenshots using this app.
People Also ReadHow to Screenshot on Gateway Laptop [Quick Guide]Quick Guide: How to Screenshot on Dell Laptop Or Desktop
Indeed, the introduction of Facetime makes iOS users’ communication a lot better. If you are one of those who have been looking for tutorials about taking Facetime screenshots, hopefully, the guides we presented here are helpful enough. Keep in mind that when Mac PCs are in use, you can always rely on apps like FoneDog Screen Recorder especially if you are looking at further enhancements and modifications of the images taken.
Leave a Comment
Comment

Tech Website Writing /Content Optimization
Singing, smiling, surprising every day!
So as a technical writer, it is my duty to gather effective and reliable solutions to answer questions on how to deal with the issues they are having with their devices.
Screen Recorder
Powerful screen recording software to capture your screen with webcam and audio.
Hot Articles
 /
/
INTERESTINGDULL
/
SIMPLEDIFFICULT
Thank you! Here' re your choices:
Excellent
Rating: 4.7 / 5 (based on 60 ratings)