FoneDog Screen Recorder
FoneDog Screen Recorder
Special Offer
Special Offer


By Adela D. Louie, Last updated: February 24, 2025
Chromebook is mostly used this day to start a Zoom meeting, and most of them encountered problems like record button not available, have not allowed the recording button on the settings, or recent updates of Zoom.
With that, we discuss the comprehensive ways how to record a Zoom meeting on Chromebook with just few clicks. All you need is your patience to read this article and you are good to go.
Part 1. How to Record Zoom Meeting on ChromebookPart 2. How to Record Zoom Meeting on Chromebook With No PermissionConclusion
How to record a Zoom meeting on Chromebook? Struggling to record a certain Zoom meeting on your Chromebook, we got you covered, just follow the step-by-step guide below.
Before you start, make sure that you have an account in Zoom and already downloaded the software in your Chromebook. If you haven’t downloaded the application yet, it is available in the official website of Zoom or can install with whatever software downloader you have.
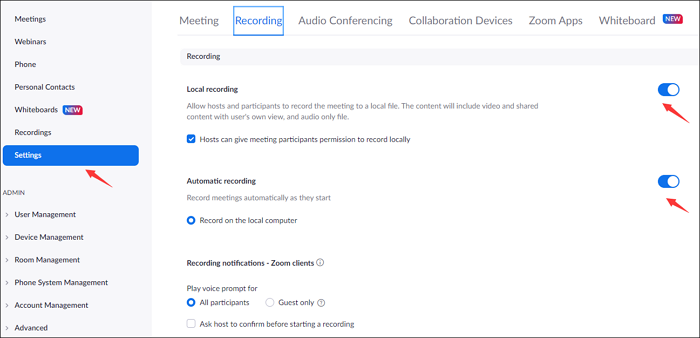
Go to the Zoom website > got your account log-in and proceed to “Profile”. Then, select “Settings” > “Recording”. By clicking so, you can enable the “Automatic Recording” option, as well as adjust the recording notification.
For reference here is the description of the actions:
Go back to the Dashboard in your Zoom, then start a Zoom meeting. It matters differently whether you are a participant of the Zoom meeting or you are the Host. For participant, you cannot directly record the meeting by not allowing the Host to grant you the permission of recording it. On the other hand, you have the power to record. Just press the “HOST” > then click the “With Video Off /On”
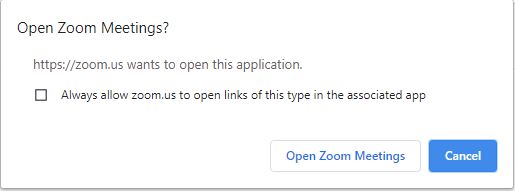
Here, it will proceed to question if you want to open with Zoom Meeting on the web page > click the “Open Zoom Meetings” if you want to.
Joining the meeting, you can see at the bottom toolbar the “Record” > and start the Zoom recording. For quick keys, just hit the “Alt” + “R”.
However, if you have enabled the recording automatically (seen in the settings) the recording would proceed immediately. Then, it will ask you to include the audio, just click “Join Audio”
There are 2 methods in viewing the Zoom Meetings:
On your PC, navigate to “Documents” and then click the “Zoom”. Find the recording you recorded from the folder.
In the Zoom website, just open again and proceed to “Recordings” > proceed to “Local Recordings”. After that, click “Open” and it will show you the Zoom recorded video. Here, you can also manage your previously recorded videos by deleting or make them remain in the recordings.
By the given steps, you can now able to know how to record Zoom meetings on Chromebook. However, it is not the same as if you are not the host—granted with no permission. So, we got you covered in the succeeding information!
In case you are wondering how to record a Zoom Meeting on Chromebook with no permission from the host, we got you covered by using a third-party software that allows you how to record a Zoom meeting on Chromebook with no added permission.
FoneDog Screen Recorder allows you to smoothly record you online meetings in a user-friendly approach without the need of asking permission. Also, it is considered to be all-in-one recording software that could record not just the screen but also the webcam, take screenshots, and record audio recording. Aside from that, FoneDog Screen Recorder allows you to edit and annotate real-time in your screen while recording it.
![]() Free Download For Windows
Free Download For Windows ![]() Free Download For normal Macs
Free Download For normal Macs ![]() Free Download For M1, M2, M3
Free Download For M1, M2, M3
To proceed here is a guide how to record a Zoom meeting without permission on Chromebook using FoneDog Screen Recorder:
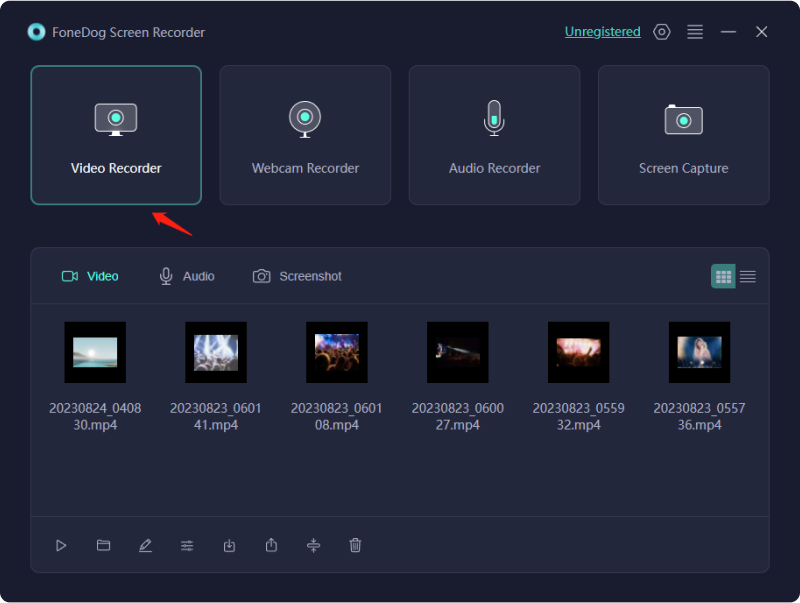
Assuming that you already downloaded ans installed the FoneDog Screen Recorder (available in the official website), in the main interface, click the “Video Recorder” to proceed. At the same time, join or open the Zoom meeting you want to attend.
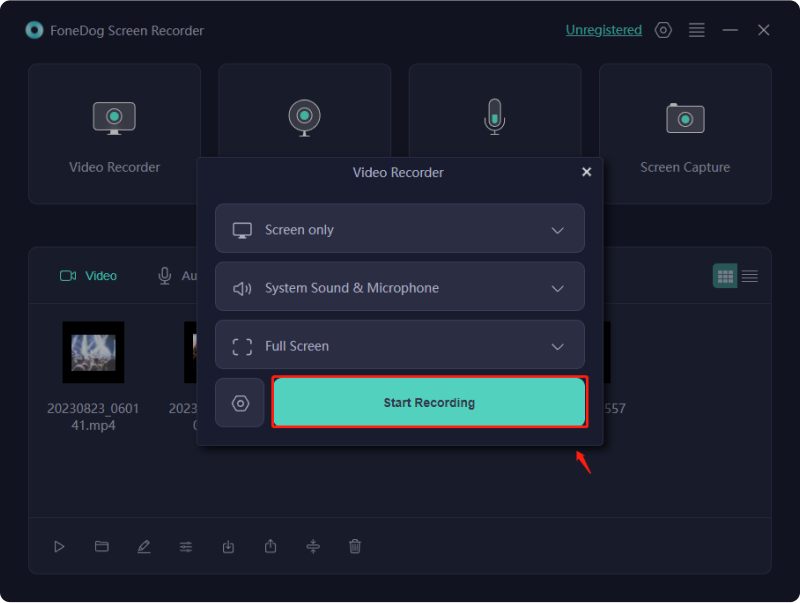
Adjust the settings by choosing what area to record and the audio input. In choosing the recording area, choose “Screen Only” if you want to record only the screen, “Screen and Camera” to record the screen and at the same time the camera.
After that, select the dimesion you want to record either in fullscreen, Windows, or Custom Size.
In adjusting the audio settings, just click “System Sound” or “Microphone” if you want to record system sound or microphone individually, “System Sound and Microphone” for both, and “None” to record nothing.
Click the “Start Recording” to begin the recording process and go back to the Zoom meeting you want to record. In this case, we recommend to choose the “Windows” as you want to record the Zoom Window.
End the recording by clicking the stop button available in the floating toolbar. After that, you have the freedom to edit the recording or make a real-time annotation during the recording process.
Summing up, we discuss how to record a Zoom meeting on Chromebook using Zoom settings (granted you have the permission) or using FoneDog Screen Recorder (if you have no permission to record). And by using the latter, you can also record audio, webcam and screenshot your screen—some extended features available. Happy recording!
![]() Free Download For Windows
Free Download For Windows ![]() Free Download For normal Macs
Free Download For normal Macs ![]() Free Download For M1, M2, M3
Free Download For M1, M2, M3
BaşarıBet’in kullanıcı dostu arayüzü sayesinde siteye giriş yapmak ve oyun oynamak çok kolaydır.
Dzięki atrakcyjnym kursom, MostBet jest jednym z ulubionych wyborów graczy bukmacherskich.
مكافآت وجوائز مذهلة بانتظارك على 1xbet، لا تفوت الفرصة!
Погрузитесь в мир высоких ставок и больших выигрышей в Kent casino.
If you experience any issues with glory casino login, customer support is available 24/7 to assist you.
Leave a Comment
Comment

Tech Website Writing /Content Optimization
Singing, smiling, surprising every day!
So as a technical writer, it is my duty to gather effective and reliable solutions to answer questions on how to deal with the issues they are having with their devices.
Screen Recorder
Powerful screen recording software to capture your screen with webcam and audio.
Hot Articles
 /
/
INTERESTINGDULL
/
SIMPLEDIFFICULT
Thank you! Here' re your choices:
Excellent
Rating: 4.8 / 5 (based on 108 ratings)
