By Adela D. Louie, Last updated: January 24, 2024
Ever wished to capture those epic gaming moments and share them with the world? Look no further! Here is a ultimate guide for you to learn how to record on Steam.
We will introduce the step-by-step instructions and tips of recording on Steam, as well as some recommended tools. This guide will help you to effortlessly capture, edit, and show your gaming records.
Part #1: Best Method for Recording Steam Gameplay - FoneDog Screen RecorderPart #2: Methods for MacOS Users on How to Record on SteamPart #3: Methods for Windows Users on How to Record on SteamConclusion
Part #1: Best Method for Recording Steam Gameplay - FoneDog Screen Recorder
FoneDog Screen Recorder stands out as an easy method to record Steam gameplay with its user-friendly interface and powerful recording features. It provides a solution to easily capture and save gaming moments on Windows PC and Mac.
 Free Download
For Windows
 Free Download
For normal Macs
 Free Download
For M1, M2, M3
Here are the steps on how to record on Steam utilizing the best gaming recording software effectively:
1. Download and install FoneDog Screen Recorder software on your computer.
2. Once installed, open it to access its interface.
3. Within the FoneDog Screen Recorder interface, selecting the desired recording area and adjusting frame rates, audio inputs, and other relevant settings.

4. Prior to starting your Steam game, initiate the recording process using FoneDog Screen Recorder. Ensure that the recording begins before launching the game to capture the entirety of the gameplay session seamlessly.
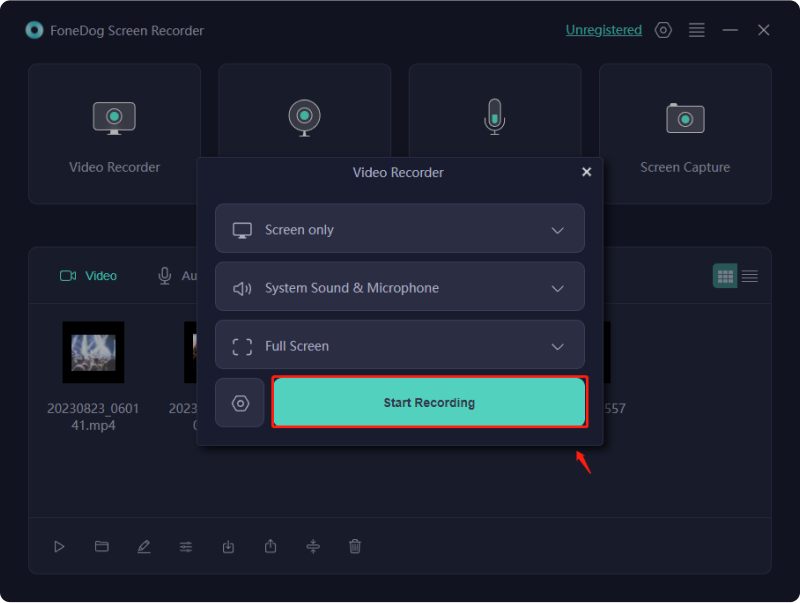
5. Start and play your chosen Steam game while FoneDog Screen Recorder captures the gameplay footage in real time.
6. Conclude the recording session when your gameplay is finished. Stop the recording process within FoneDog Screen Recorder to finalize and save the captured gameplay footage.
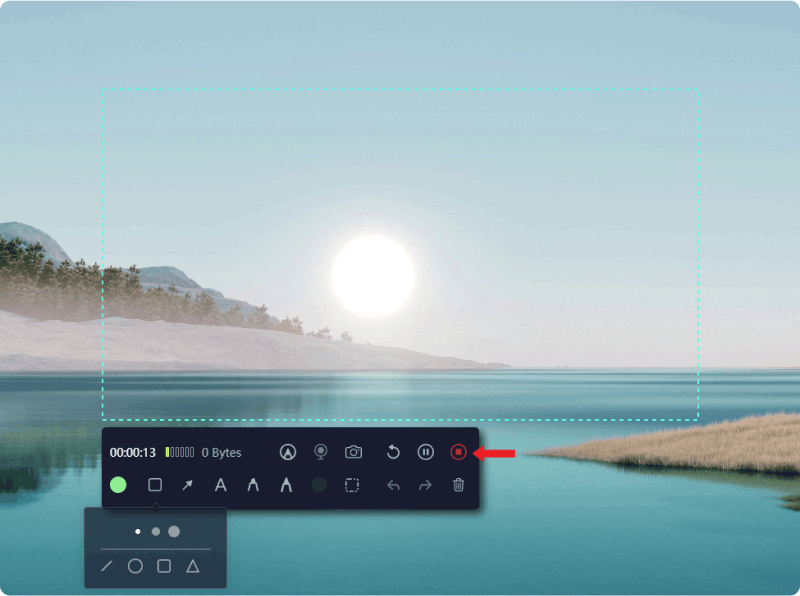
7. After stopping the recording, access the saved gameplay footage through FoneDog Screen Recorder's interface. You can locate and play the recorded video to review your gaming session.
FoneDog Screen Recorder simplifies the process of recording Steam games. With it, you can easily record and preserve your gaming experience.
Part #2: Methods for MacOS Users on How to Record on Steam
On MacOS, there are several methods and applications you can use to record Steam gameplay. Here are a few popular ones along with steps on how to record on Steam gameplay:
Method #1: Using Built-in MacOS Features (QuickTime Player):
To record Steam on Mac using QuickTime Player, follow these steps:
- Launch QuickTime Player from the Applications folder. You can also search it on the Spotlight.
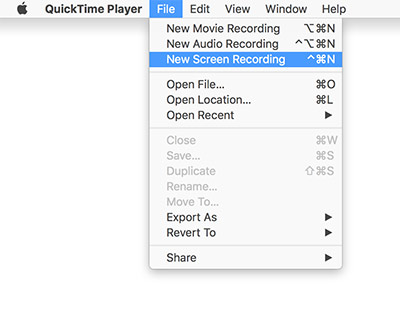
- Then, Go to the menu bar and click on "File".
- From the drop-down menu, select the option labeled "New Screen Recording".
- If necessary, choose your preferred audio input options at this stage.
- To commence the recording, click on the designated record button and specify the area of the screen you wish to capture.
- Start your Steam game and begin playing to capture the desired gameplay.
- When you have completed recording the gameplay, navigate to the menu bar once again and click on the Stop button to conclude the QuickTime screen recording session.
- Finally, ensure to save the recorded gameplay by following the appropriate steps within QuickTime Player.
Method #2: OBS Studio (Open Broadcaster Software):
Here are the steps to record Steam gameplay on MacOS using OBS Studio:
- Download OBS Studio proceed to install it on your Mac.
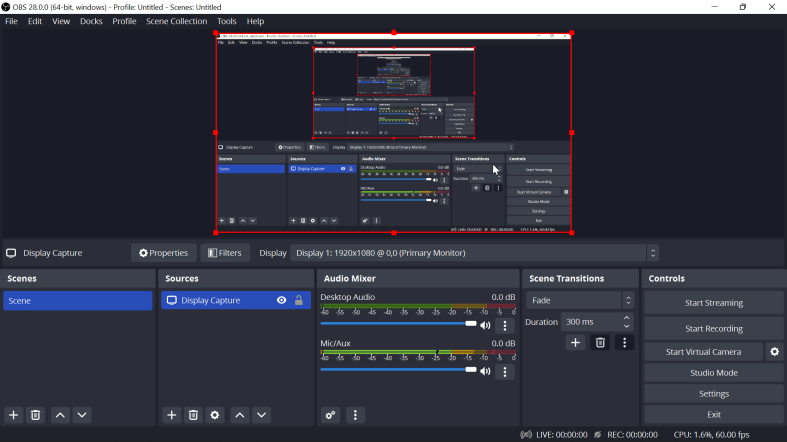
- Once the installation is complete, open OBS Studio to start the setup process. Create a new source within OBS Studio by selecting either "Display Capture" or "Game Capture" based on your preference and the type of content you intend to record.
- Configure various settings within OBS Studio to optimize your recording experience. This includes adjusting parameters such as resolution, and frame rate, and selecting suitable audio sources for capturing sound.
- Launch your preferred Steam game that you wish to record.
- When you're prepared to commence the recording session, navigate within OBS Studio and click on the "Start Recording" button. This action initiates the capturing process.
- Play the Steam game as desired, ensuring that OBS Studio is recording the gameplay.
- Upon completion of the gameplay recording, click on the "Stop Recording" button within OBS Studio to conclude the recording session and save the gameplay footage.
Method #3: ScreenFlow:
Follow these steps to record Steam gameplay on MacOS using ScreenFlow:
- Install ScreenFlow and open the application.
- Locate and click on the prominent red "Record" button situated in the top toolbar of the interface.
- To specify the area you wish to capture during gameplay, carefully select the portion of the screen or set up specific recording areas within ScreenFlow's settings.
- Launch the Steam game you intend to record and initiate gameplay.
- When you've completed recording the desired gameplay, cease the recording process by clicking on the designated stop button available in the menu bar of ScreenFlow.
- If necessary, proceed to edit the recorded gameplay footage directly within the ScreenFlow application, utilizing its editing functionalities to refine or modify the captured content to your preference.
Method #4: Capto:
- Download and install Capto on your Mac.
- Launch Capto, and navigate to the main interface and locate the designated "Record" button.
- Click on the "Record" button within the Capto interface to initiate the recording process.
- Once the recording interface is active, you'll have the option to adjust various settings according to your preferences. Additionally, choose the specific area or screen region you want to capture during gameplay.
- Start your Steam game to begin playing and ensure that Capto is actively recording the gameplay session.
- Upon completion of the gameplay recording, conclude the recording process by clicking on the designated stop button within the Capto interface.
- After stopping the recording, proceed with any necessary editing tasks within Capto to refine or enhance the recorded gameplay footage as desired.
- Finally, save the edited recording through Capto's interface to retain the modified gameplay footage for future use or sharing purposes.
Part #3: Methods for Windows Users on How to Record on Steam
Recording Steam gameplay on Windows can be achieved through various applications and methods. Here are some popular options along with the steps on how to record on Steam on Win:
Method #1: Using Windows 10 Game Bar:
Follow these steps to record gameplay on Windows using the Game Bar feature:
- Launch your Steam game on your Windows PC.
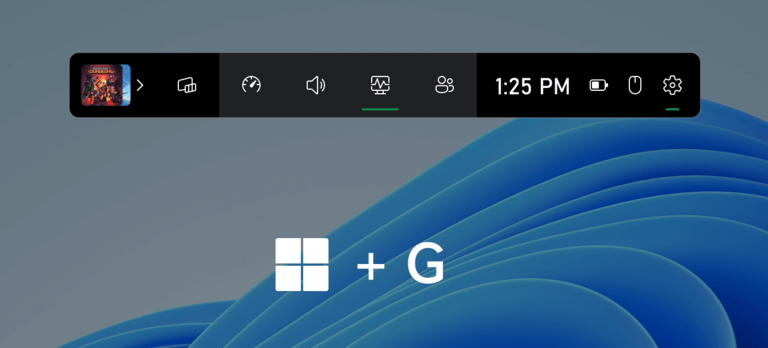
- Initiate the Game Bar by pressing the "Windows key + G" combination on your keyboard.
- Within the Game Bar interface, locate and click on the designated record button, represented by a circle icon. Alternatively, use the shortcut "Windows key + Alt + R" to commence the recording.
- To conclude the recording session, utilize the same shortcut used to start recording ("Windows key + Alt + R") or return to the Game Bar and click on the stop button.
- Once the recording is stopped, navigate to the "Captures" folder on your Windows system to access the recorded gameplay videos for playback or further use.
Method #2: NVIDIA ShadowPlay (for NVIDIA GPU users):
Here are steps to prepare and use NVIDIA ShadowPlay for recording Steam gameplay on a Windows system:
- Verify that your computer has the most recent NVIDIA drivers installed to ensure optimal performance.
- Access GeForce Experience, and within its interface, activate the ShadowPlay feature.
- Customize the recording settings according to your preferences, including adjustments for video quality, resolution, and desired recording duration
- Start your Steam game to begin gameplay, and when ready to commence recording, use the configured shortcut keys (typically defaulting to Alt + F9) to initiate the recording.
- Throughout the gameplay session, utilize the same shortcut to control the recording, allowing you to start and stop the recording process at your convenience.
Method #3: Bandicam:
- Download Bandicam and complete the installation process.
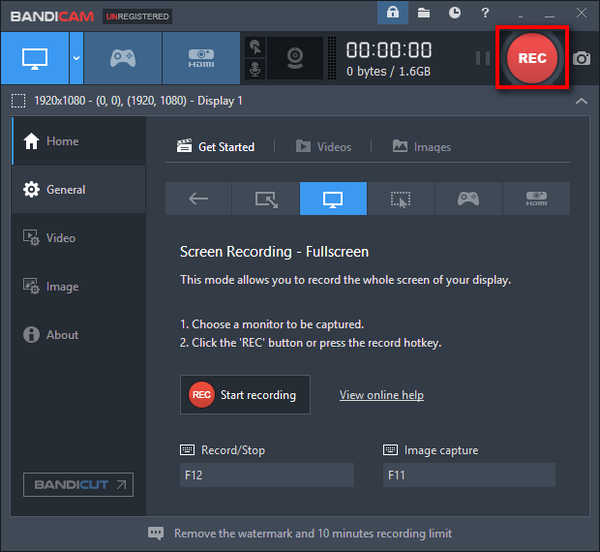
- After that, open it and access the settings to configure various options such as selecting the recording area, setting the desired frame rate, and adjusting other relevant settings according to your preferences.
- Before launching your chosen Steam game, initiate the recording process using Bandicam. Ensure that the recording starts prior to starting the Steam game.
- Play the game as desired, allowing Bandicam to capture the gameplay footage throughout the gaming session.
- Upon completion of the gameplay or when you wish to conclude the recording, stop the recording process using Bandicam. This action marks the end of capturing the gameplay session using Bandicam.
People Also Read2024 Guide on How to Fix Error - Screen Record Not WorkingComplete Guide on How to Record A Live Stream on PC
Conclusion
Indeed, to conclude start recording and sharing your gaming escapades today! Capturing gameplay on Steam not only preserves memorable moments but also allows you to showcase your skills on how to record on Steam and experiences with friends and the gaming community. Sharing these adventures fosters connections, entertains, and immortalizes your gaming achievements, adding depth and fun to your gaming journey. Have a fine day ahead!


Free Download
For Windows
Free Download
For normal Macs
Free Download
For M1, M2, M3


/
/