By Adela D. Louie, Last updated: July 4, 2024
Have you ever wondered how to record crystal clear film and improve recording quality? There is no need to look any further! This complete tutorial offers step-by-step instructions for webcam recording.
Prepare to learn how to record with webcam on any computer. This article provides your reference even if you're a newbie. Read along to improve your recording skills.
Part 1. How to Record with Webcam on Windows/Mac ComputerPart 2. How to Record with Webcam (Windows)Part 3. How to Record with Webcam (Mac)Conclusion
Part 1. How to Record with Webcam on Windows/Mac Computer
FoneDog Screen Recorder is the top choice for webcam recording. This intuitive software enables users to easily capture high-quality video content using their webcam. FoneDog guarantees easy steps for both newbies and experienced designers.
 Free Download
For Windows
 Free Download
For normal Macs
 Free Download
For M1, M2, M3
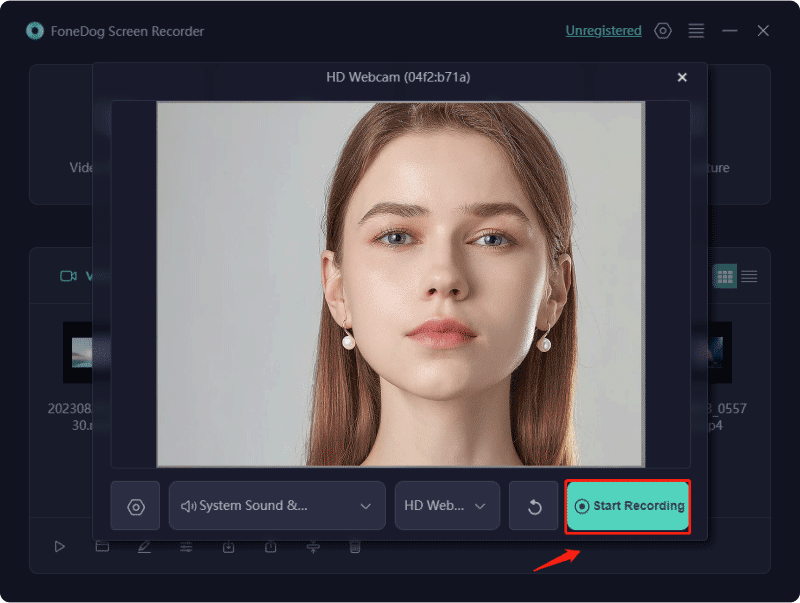
This tool allows users to record, edit, and share webcam footage with ease. Able to adapt to various recording needs and deliver high-quality videos, FoneDog Screen Recorder is the best way to utilize your webcam for content creation and online presentation. Here’s how to use it:
- Before anything else, go to the FoneDog website and download the software that is compatible for your computer.
- Start the FoneDog Screen Recorder app. Customize recording parameters like as picture quality, frame rate, along with audio inputs to meet your unique needs.
- To begin the video capture procedure, select the webcam as your recording source. Press the "Start Recording" button to start the recording.
- Improve recordings by using methods of annotation or adding other components to offer more clarity or emphasis throughout the recording.
- Finish the recording and save the file to your computer.
Part 2. How to Record with Webcam (Windows)
Here is a list of excellent webcam recorders for Windows computers to easily record webcam content.
Using Windows Built-in Camera App:
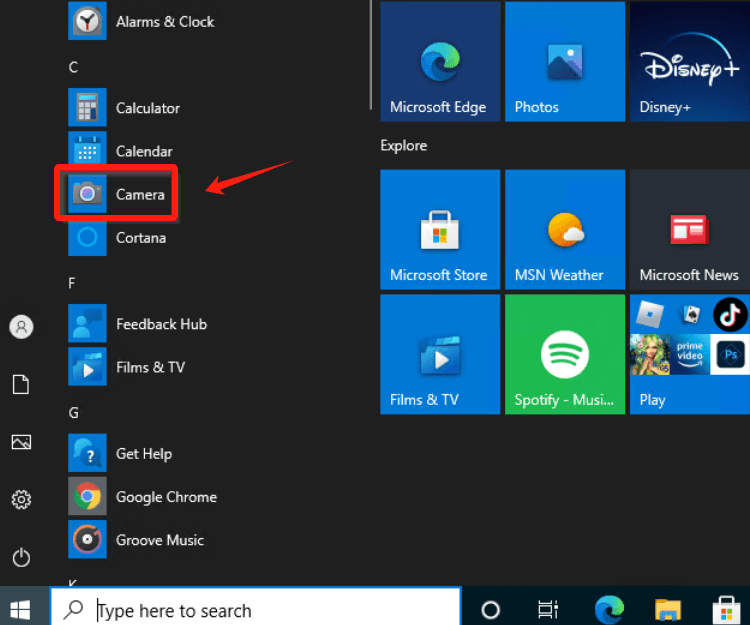
Your computer's integrated webcam is capable of video recording, although its quality may not match that of a specialized camera. Here's a guide on capturing videos on Windows 10:
- Go to the Start menu and run the Camera app, or use the search bar to locate the Camera application.
- Start the process by clicking the video camera icon.
- When you need to halt the recording, click on the Stop button. For brief pauses in your recording, click the Pause button.
Remember that the default storage destination for the photos and videos captured through the Camera app is This PC > Pictures > Camera Roll.
Using Icecream Screen Recorder:
The program has an easy-to-use interface and features, which makes it a great solution for those who want to save webcam recordings. In just a few simple steps, you can easily create a movie of your own.
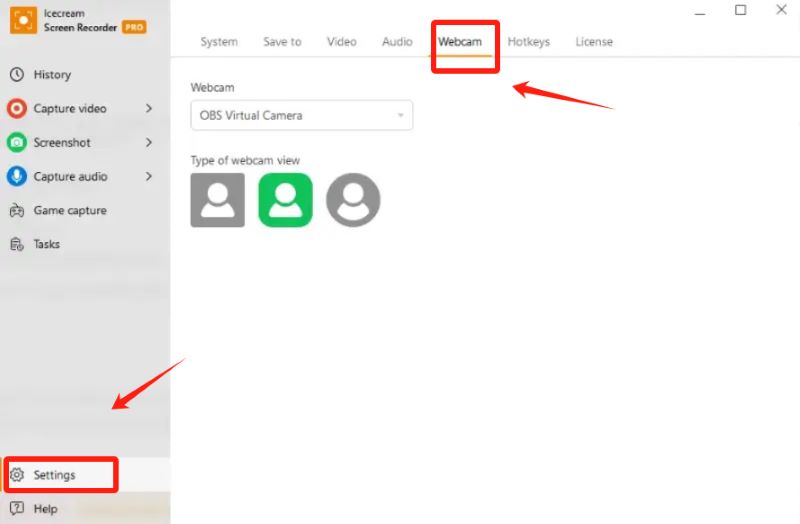
- Begin by downloading and installing the recorder, then launch the program. Access the "Settings" panel and navigate to the "Webcam" tab.
- From that, choose upon the preferred camera style, whether square, circle, etc. Opt for the desired output format and quality and click the Webcam icon to activate your camera's capture. Thereafter, adjust the size as needed.
- Press on option that implies to "Capture video" and designate the screen area for recording. In the ensuing window, toggle on that option "Webcam On."
- Press "Record" to start capturing your webcam video, with the flexibility to pause or resume using the "Pause/Resume" button. Upon completion, just simply click "Stop Recording" to preserve your video file.
Using Loom:
Leverage Loom as an alternative method for camera recording. This dual-functionality application and online utility serve as an ideal remedy for capturing educational video content. It stands out as a user-friendly and efficient tool, facilitating the swift recording, editing, and sharing of videos.
- Create an account on the software's official website. To activate recording capabilities, either download the desktop application or install the browser extension.
- Access your account on the web, and locate the "Record a video" option situated in the bottom-left corner. Verify your camera status; if the program lacks permission to use your webcam, activate it.
- For exclusive webcam capture, hover over the image circle and select the second icon from the right to expand it to full screen. When prepared, initiate recording by clicking "Start recording."
- Upon completing your webcam recording, cease the process by clicking the red stop icon. Alternatively, employ the hotkey combination of “Ctrl + Shift + L”.
- To share your video with others, click the "Share" button.
Using OBS Studio for Windows PC:
OBS Studios is a popular platform throughout streamers, content makers, meeting organizers, and those involved in video-related duties. It is considered one of free webcam recording software alternatives for Windows 10 and Windows 11. Its extraordinary versatility enables the effective administration of many cameras along with video providers. To capture videos using OBS, follow these steps:
Initiate the software and ensure seamless connectivity for all your cameras or webcams.
- Head over towards into Sources menu and click on the “+” icon which then positioned at the bottom left corner of the.
- Next, look and search for Video Capture Devices.
- From that, open up the properties message box where you can input the desired resolution of the clip, also the aspect ratio alongside with the frame rate. It's advisable to match the camera or perhaps the webcam resolution, typically 1980 x 1080 or lower.
- Head to the Control section and clicking upon that option that implies to “Start Recording”.
Part 3. How to Record with Webcam (Mac)
What if you're using an Mac computer? To record with webcam on Mac, read the list below to find the one that suits your need.
Using Built-in QuickTime Player:
QuickTime Player is a free download on most Macs. Besides, it is a valuable resource for video recording and it does support a wide range of video formats. Follow these steps to capture webcam using this tool:
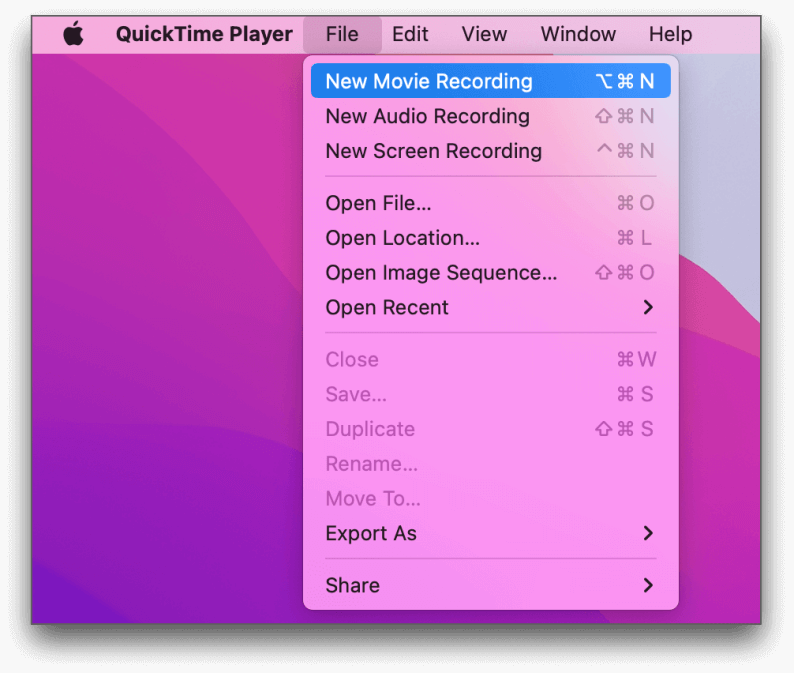
- Go to the Applications folder and start QuickTime Player.
- Select "File" then press on option "New Movie Recording". This option, by default, will enable the Mac's forward-facing camera.
- From there, start recording by simply tapping onto the screen's center red Record button. The recording is stopped with a second push.
- Now, locate the menu bar and click “File” > “Save” to save the recording. To quit the QuickTime Player interface, click the red circle in the upper-left corner. You'll be asked to give the recording a name and select a location to save it.
Using Photo Booth:
The Photo Booth application comes pre-installed on the majority of Mac computers and stands out as one of the simplest methods to capture video. Here's a step-by-step guide:
- Open up the Photo Booth app by either simply selecting its icon from the Mac Dock or find it from the Applications folder.
- After that, locate the Record a movie clip icon from the lower left part of the screen which then it resembles a film reel.
- To start recording, press the red record button located in the very center of the screen. You can then press the same button again to stop recording.
- Below the main image, some thumbnails will appear, each representing a video or photo taken with Photo Booth. After that, you can select the most recent recording to export, which is located on the right.
- After that, you can now navigate to the bottom right corner of the window and click on the share icon and select your preferred sharing method.
Using iMovie:
If iMovie isn't already on your Mac, grab it from the Mac App Store which it's freely available for all Mac users. After securing iMovie, initiate your recording directly from the Mac webcam.
- Go to the iMovie menu bar, select "File", then choose "New Movie", or click "Create New" from the iMovie projects screen.
- Click the downward-facing import arrow at the top of the iMovie interface. In the left panel, go to the "Cameras" section and select "FaceTime HD Camera".
- If it's your first time using the FaceTime camera in iMovie, you'll need to allow the app to access your Mac's microphone and camera.
- After that, open the "Import to" drop-down menu at the top of the iMovie screen and select the project you're working on..
- Click the circular "Record" button at the bottom of the screen to start recording. Click it again to stop recording. End the session by clicking "Close" at the bottom of the screen.
- Click "Projects" in the upper-left corner of the iMovie window to save your work and return to the main projects menu.
People Also ReadHow to Record Video from Webcam on PC [Windows & Mac]11 Most Recommended Webcam Online Recorder (2024)
Conclusion
In conclusion, mastering how to record with webcam is within reach with tools like FoneDog Screen Recorder. From setup to annotation, this guide has unveiled the essentials for creating captivating videos. Elevate your content, embrace creativity, and make your mark in the online realm. With user-friendly interfaces and advanced features, the journey from recording to sharing becomes a seamless and rewarding experience for content creators of all levels.


Free Download
For Windows
Free Download
For normal Macs
Free Download
For M1, M2, M3


/
/