
By Adela D. Louie, Last updated: May 24, 2024
Are you exhausted by the process of going through menus in order to record a small portion of your screen? Bid farewell to time waste and welcome productivity! This guide provide and reveals the entire key shortcut for Snipping Tool, which is the ideal method for swiftly and accurately capturing screenshots.
Whether you are a professional requiring to take screenshots or even a student gathering research data, this shortcut will simplify and quicken your process. Join along as we explore the potential of effortless screen capturing, enabling you to enhance productivity and efficiency.
Part 1. Best Tool for Taking Screenshot on Mac or WindowsPart 2. Keyboard Shortcut for Snipping ToolPart 3. Ways on How to Open Snipping ToolPart 4. FAQsConclusion
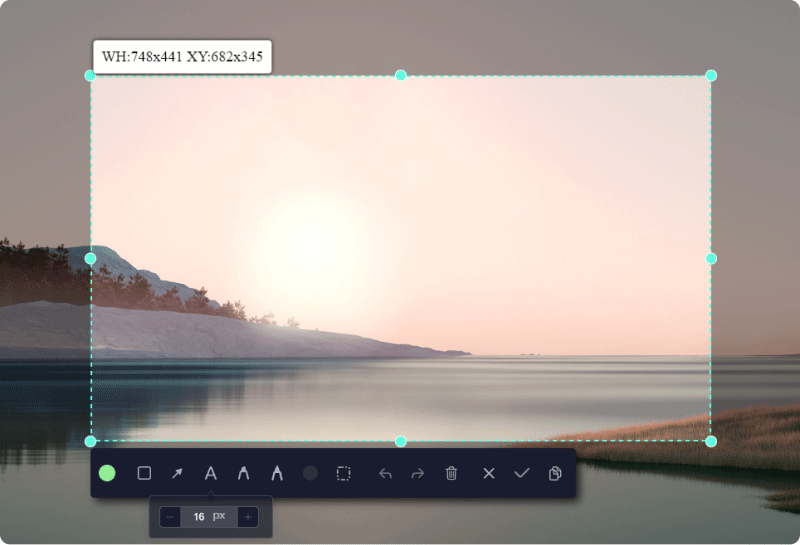
FoneDog Screen Recorder stands out as the premier choice for capturing screenshots on both Mac and Windows platforms. Its intuitive interface simplifies the process, allowing users to effortlessly capture custom-sized screenshots with precision.
With a range of editing tools available, including annotation features, it offers comprehensive functionality for enhancing and refining captured images, making it the ultimate tool for screenshotting on any operating system, as well as record screen on a PC.
Free Download
For Windows
Free Download
For normal Macs
Free Download
For M1, M2, M3

Familiarity with Snipping Tool shortcuts enhances efficiency for frequent screen capturing. Below are useful keyboard shortcut for Snipping Tool on Windows:
New" – Initiate a new screenshot in rectangular snip.Ctrl+N" – Start a new screenshot in the previous-used snip.Ctrl+S" – Save the current screenshot.Ctrl+C" – Copy the current screenshot to clipboard.Ctrl+Z" – Reverse the last screenshot edit.Ctrl+Y" – Restore the last undo action.Ctrl+F" – Access the "Find" dialog for text search within the screenshot.Ctrl+A" – Highlight the entire screenshot.Ctrl+P" – Open the "Print" dialog for screenshot printing.To alter the screenshot type, use these mode of snipping shortcuts:
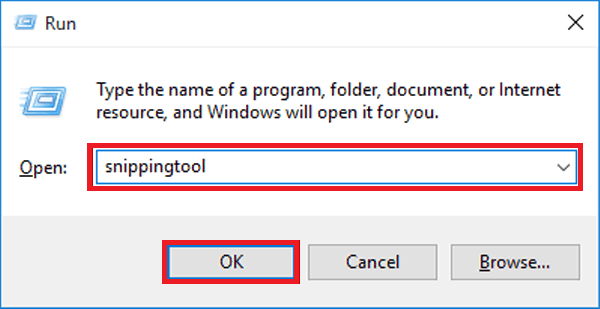
Ctrl+Shift+N" – Initiate a new screenshot in free-form snip.Ctrl+Shift+M" – Start a new screenshot in rectangular snip.Ctrl+Shift+W" – Begin a new screenshot in window snip.Ctrl+Shift+I" – Initiate a new screenshot in full-screen snip.Opening the Snipping Tool on your Windows computer is a straightforward task. You have several options at your disposal to accomplish this:
Similar to various functions in Windows 11, there exist numerous methods to initiate the Snipping Tool. You can locate it within the Start menu or trigger its launch from the Task Manager. Nonetheless, the most expedient approach involves employing a keyboard shortcut. To prompt the Snipping Tool via a keyboard shortcut, adhere to the subsequent steps:

The Start menu in Windows grants entry to a broad array of applications that are readily accessible. To initiate the Snipping tool via the Start menu, adhere to these guidelines:
Windows 11 introduces an enhanced search capability, streamlining file exploration. Utilizing Windows Search, you simply input your desired item into the search field, prompting Windows to display relevant file matches. This efficient method saves time and ensures precise results. To initiate the Snipping Tool via Windows Search:
Once the Snipping tool interface is open, you can utilize it as previously to capture screenshots of your screen.
Moreover, if you opt for utilizing command line approaches, you have the option to launch the Snipping Tool via Command Line Interface or Windows Terminal. Here's how:
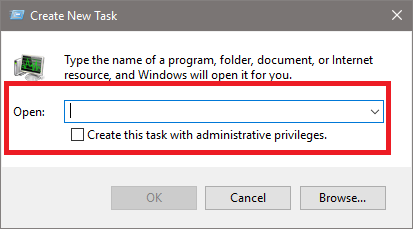
PowerShell".Ctrl+Shift+Enter" on the keyboard.Task Management is a useful utility for overseeing your computer's resources and terminating unresponsive applications. However, its utility extends beyond this. You can employ Task Management to initiate applications installed on your computer. To access the Snipping Tool via Task Management, adhere to these instructions:
Ctrl + Shift + Esc” right within the keyboard.
With Cortana activated on Windows 10 or even such of Windows 11, simply utter "Hey Cortana, launch the Snipping Tool," and it will promptly initiate the application.
This visual interface facilitates file system navigation. An integral component is the address bar located atop the window. This feature enables swift application access through direct name input. To launch the Snipping Tool via File Explorer:
Not at all, the Snipping Tool is incapable of letting you change the keyboard options that come with it. Users typically rely on default shortcuts provided by the operating system. However, third-party tools or scripts might offer limited customization options for advanced users.
Regrettably, the Snipping Tool does not include an inherent keyboard shortcut for capturing the complete screen.
No, the Snipping Tool doesn't offer specific keyboard shortcuts for checking updates or accessing settings. These actions typically require navigating through the application's user interface using the mouse or touch input.
At now, the Snipping Tool lacks integrated keyboard shortcuts for instantly distributing snips through email or other applications. After taking a snip, users typically save it and then manually share it using the desired application or method.
A new snip could be initiated without closing the existing one by hitting the keyboard shortcut "Ctrl + N". This shortcut enables you to start a new snip yet maintain the current one active, offering an easy method to capture numerous snips in a row.
People Also ReadQuick Guide: How to Screenshot on Dell Laptop Or Desktop(2024) How to Screenshot on ThinkPad - 6 Easy Methods
In conclusion, mastering key shortcut for Snipping Tool enhances efficiency and productivity in capturing and annotating screenshots. These shortcuts streamline the process, offering quick access to essential functions. As such, integrating FoneDog Screen Recorder into capturing screenshot shortcuts will boosts workflow usability, making a best tool for visual communication and documentation.
Free Download
For Windows
Free Download
For normal Macs
Free Download
For M1, M2, M3
Leave a Comment
Comment
Screen Recorder
Powerful screen recording software to capture your screen with webcam and audio.
Hot Articles
/
INTERESTINGDULL
/
SIMPLEDIFFICULT
Thank you! Here' re your choices:
Excellent
Rating: 4.8 / 5 (based on 97 ratings)