
By Adela D. Louie, Last updated: August 30, 2019
Mobile devices that we have in today’s technology serves to be as our on-hand cameras which only means that people just love to take pictures to treasure every moment. And with those iPhone users, photos that they have on their devices eats up a lot of space on their storage. That is why most users would like to do is to transfer photos from iPhone to Mac since both products are owned by just one company which is Apple.
Aside from the fact that we can save space on our iPhone devices by transferring photos to your Mac, it can also be one great and easy way for you to edit some of your photos. So because of that, we are going to show you in this post some ways on how to transfer photos from iPhone to Mac the quickest and easiest way possible.
We are also going to show you a simple yet very efficient tool that you can use for you to transfer your photos by backing them up using a backup and restore tool for iPhone and Mac devices. With that, it will be a great way for you to keep your data safe – not just your photos but as well as other data that you have on your iPhone device.
Part 1: How to Transfer Photos from iPhone to Mac Using the Photos AppPart 2: How to Transfer Photos from iPhone to Mac Using iCloudPart 3: How to Transfer Photos from iPhone to Mac Using AirDropPart 4: A Way That You Can Use to Transfer Photos from iPhone to MacPart 5: Conclusion
The quickest way for you to transfer your photos from iPhone device to your Mac is by using its USB cable and have it connected to your Mac. And once that your iPhone device is connected, your Photos app on your Mac will then automatically launch and recommend to transfer your photos. So with that, here are the steps that you need to follow.
Step 1: Using your USB cable, go ahead and have your iPhone device connected to your computer.
Step 2: And if necessary, unlock your iPhone device and confirm the trust to your Mac.
Step 3: Then, the Photos app on your Mac should now be able to show you your photos from your iPhone device. If in any case that this does not happen on your end, then all you have to do is to click on your iPhone from the menu on your left side of your Photos app. From then on, you will be able to see your images and as well as your videos from your Camera Roll folder.
Step 4: After that, go ahead and hit on the Import All New Items option located at the upper-right hand corner of your screen. Or you can choose those photos that you would just like to transfer from your iPhone device to your computer.
Step 5: Then after that, go ahead and hit on Import Selected option. And once that the process of transferring your photos from your iPhone device to your computer, you can set your photos to automatically remove the ones that are still on your iPhone device. This way, you will save up more storage space on your iPhone.
Another good way for you to transfer your photos from your iPhone device to your Mac is by using your iCloud. But, if in any case that you have more than 5GB of videos and photos, then there is a need for you to upgrade your storage and you can do that by purchasing more.
For you to be able to set up your iCloud Photo Library using your iPhone device, here are the steps that you need to follow.
Step 1: On your iPhone device, go ahead and open the Settings app.
Step 2: And then, tap where you see your name located at the top of your screen.
Step 3: Then from there, you have to tap on iCloud.
Step 4: Under iCloud, you will then be able to see a list of application that is using your iCloud account.
Step 5: From there, tap on iCloud Photo Library for you to turn it on.
After doing all the steps above, then it is time that you do the same on your Mac. Here is how.
Step 1: On your Mac, go ahead and open your Photos app.
Step 2: Then from there, go to its menu bar.
Step 3: Then, go ahead and click on Preferences.
Step 4: After that, hit on iCloud.
Step 5: Then click on the checkbox that is beside the iCloud Photo Library.
And then once that you are done with all of the steps above and both your iPhone and Mac are using the same iCloud account, then all of your photos from your iPhone will automatically be synced on your Mac device as well.
NOTE: While you are still making use of your iCloud Photo Library, then that means that if you change anything on your photos on your iPhone device, then it will also apply on your Mac. So, in case you would like to keep your photos on your Mac and delete it on your iPhone device, then you have to turn off your iCloud Photo Library first.
Another way that you can transfer your photos from iPhone device to your Mac wirelessly is by using AirDrop. And with that, here are the things that you will be needing to follow and apply them on both devices.
Step 1: Go ahead and open the Settings app.
Step 2: Then from Settings, go ahead and choose General.
Step 3: Then go ahead and look for AirDrop and tap on it.
Step 4: Then from there, set your AirDrop to “Everyone” for you to be able to send any data to other iOS devices.
Step 1: Go ahead and open up the Finder app on your Mac.
Step 2: And then, choose Go from the menu bar and then select on AirDrop.
Step 3: From there, you have to set your AirDrop to “Everyone” as well.
Then after doing all the steps on both devices, you have to wait for a few minutes for both devices to detect each other. And after that, here are the steps that you need to follow for you to transfer your photos.
Step 1: Go ahead and launch your photos on your iPhone device.
Step 2: From there, go ahead and choose all of the photos that you would like to transfer from your iPhone device to your Mac.
Step 3: And once that you are done choosing all of the photos that you would like to transfer, simply tap on the sharing button which can be found at the bottom left corner of your screen.
Step 4: Then from there, you have to wait for the AirDrop to look for your Mac device and tap on it.
Step 5: Then on your Mac device, a pop-up box will show up and ask you to accept the photos that you are sending from your iPhone device. All you have to do from here is to click on the Accept button to process the transfer. And once that you are done with the transferring process, you can now go ahead and turn off AirDrop on both your iPhone and Mac device.
Aside from all of the ways that we have shown you above, there is another way on how you can transfer photos from iPhone to Mac device. And that is by using a backup and restore tool. This way, you will be able to transfer your photos from your iPhone device to your Mac, and at the same time, you can also keep your photos safe by backing them up.
And speaking of a backup and restore tool, there is one that is recommended by a lot of iPhone and Mac users. And that tool is the FoneDog iOS Backup and Restore.
This is because the FOneDog iOS Backup and Restore is a tool that has the ability to backup all of the data that you have on your iPhone devices such as your photos, videos, messages, contacts, and more. And so with that, here are the quick steps that you can follow for you to be able to transfer photos from iPhone to Mac using the FoneDog iOS Data Backup and Restore.
Step 1: Get FoneDog iOS Data Backup and Restore
First, you have got the FoneDog iOS Data Backup and Restore from the FoneDog’s website and install it on your Mac.
Step 2: Connect iPhone to Mac
Once you have installed the FoneDog iOS Data Backup and Restore, go ahead and start running the program on your Mac. Then have your iPhone device connected to your Mac using your USB cable. Then wait for the program to fully detect your iPhone device.
Step 3: Choose iOS Data Backup
Then on the main page of the FoneDog iOS Data Backup and Restore, go ahead and choose iOS Data Backup and then proceed with the next process.
Step 4: Choose Desired Mode of Backup
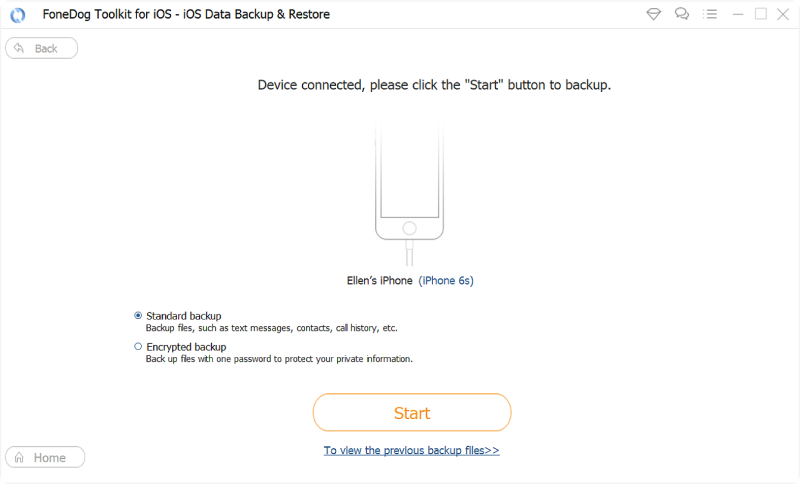
After that, the program will then be able to ask you on how you would like to backup your data from your iPhone device to your Mac. You can choose from the Standard Backup which is the normal way to backup, and the Encrypted Backup wherein you can key in any passcode that you want to protect your backup file.
After choosing from the two options, go ahead and choose the Start button for you to continue on the next process.
Step 5: Choose Photos to Backup and Transfer
After choosing the mode of backup, the program will then show you all the files that it supports. From there, all you have to do is to choose Photos. Then you can go ahead and simply all the photos that you would like to backup from your iPhone device to your Mac.
Step 6: Finish Backup Process
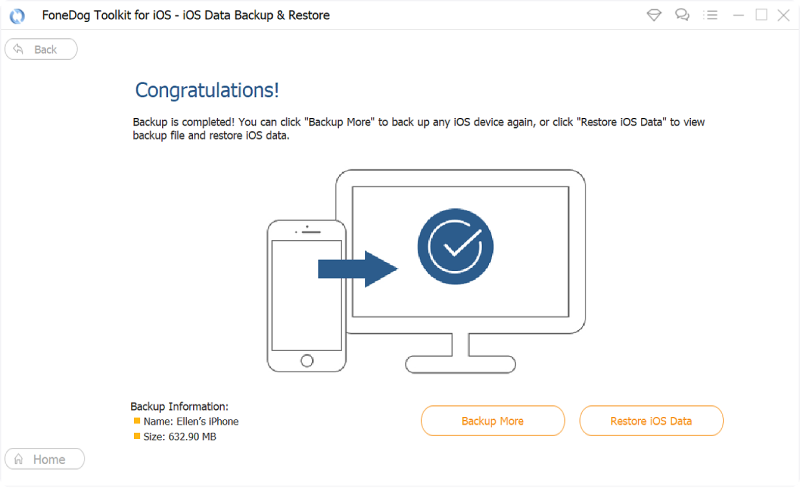
Once that you have chosen all of the photos that you want, just go ahead and click on the Next button. Then the FoneDog iOS Data Backup and Restore will start to backup your photos from your iPhone device to your Mac and transfer them at the same time.
So that is how you can transfer your photos from your iPhone device to your Mac easily and quickly. And aside from your photos, you can also transfer some other data that you want from your iPhone device using the FoneDog iOS Data Backup and Restore. And the best part of it is that, if anything happens to the data on your iPhone device, you can still have them restored on your iPhone using the FoneDog iOS Data Backup and Restore.
This program is very easy to use and thus it will keep your data safe at all times. And when you want to restore them on your iPhone device, you have the option to selectively choose the data that you just want to restore on your iPhone. Same with backing them up.
So when it comes to transferring your photos from your iPhone device to your Mac, there are a lot of ways on how you can do them. And with that, we have come up with all of the solutions that you can apply in the process of transferring your photos. You can choose any methods that you want from the above selection.
However, if you want to make sure that you wish to keep your data safe at all time – not just your photos – then you can use the FoneDog iOS Data Backup and Restore tool. This way, you can keep your other data such as messages, contacts, call history, WhatsApp, and some other data safe to by having them over to your Mac computer.
Leave a Comment
Comment
Android Toolkit
Recover deleted files from your Android phone and tablet.
Free Download Free DownloadHot Articles
/
INTERESTINGDULL
/
SIMPLEDIFFICULT
Thank you! Here' re your choices:
Excellent
Rating: 4.7 / 5 (based on 59 ratings)