FoneDog Screen Recorder
FoneDog Screen Recorder
Special Offer
Special Offer


By Adela D. Louie, Last updated: February 15, 2023
Are you one of those people who have a lot of videos stored on their laptops that you want to edit? Well, if you are new to this industry, this can sound alarming. And one of those scenarios that you can be facing is when you wanted to know how to resize your video to fit into the frame. And most probably, some editors would recommend you to use one of the most popular tools which is Adobe Premier. It is because you can use the Adobe Premiere resize video to fit your video frame.
Well, a tool that you use for you to resize your videos will actually help you in working with several videos and even with your photos. So, if you consider it but do not know how, then this is your lucky day because we are going to show you how to use this tool.
Part #1: What is the Importance of Using a Video Resizing Software Part #2: Adobe Premiere Resize Video to Fit – How to Use It Part #3: An Alternative Way to Resize Video Part #4: Conclusion
A video resizing tool actually will help you when it comes to reducing the size of your original video or photos. And because of that, once you resize them, it will also mean that you will be able to clear up space on your Mac or on your mobile device that you are using. This also means that you will be able to store more videos on your device as well. And this will prevent your device from lagging.
And when it comes to sharing your videos with your family and friends, then using adobe premiere resize video to fit is a great idea so it will be sent easily and faster. And when you resize your videos, you can also be able to remove the part of your video that you do not like. And at the same time, you do not have to worry about the quality of it because it will still be the same.
Now, if you really want to know how you can use Adobe Premiere to resize your video, then here is a guide that you can easily follow.
Now, the very first thing that you should do for Adobe Premiere resize video to fit is for you to select on the frame size. Here is a further guide.
The first thing that you need to do is to add or import the video that you want to resize to the Adobe Premiere tool. You will be able to see that the size before you set the frame is 100. So, from here, all you have to do is to do a right-click on the video that you are working on.
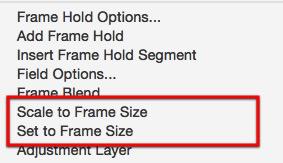
And when you right-click on the video that you are working on, you will be able to see a pop-up menu. From there, just scroll through it for you to find the “Scale to Frame Size” option and click on it. And once that you click on it, you can then resize your video to your preferred choice.
This is also another method on how you can use the Adobe Premiere resize to fit. This is known to be the easiest and the simplest way how you can resize your video. Once you are trying to set the Scale to Frame Size, you will also be needing to click on the video that you are working on through Adobe Premiere and then look for the option “Set to Frame Size” and click on it. Then the Adobe Premiere resize video to fit and to adjust your video's dimension.
The Scale to Frame Size is a process wherein you are using your computer to resize your videos to reduce their size. This is actually not a recommended way, but this is still considered to be a good way for you to free up space on your computer so that you can save more important videos. This also will help you when you share them with other friends and family members.
On the other hand, Set to Frame Size is normally used if and when the tool will set the frame size matching its sequence and is done automatically. And this method is actually often getting the right size.
Now, instead of Adobe Premiere resize video to fit, if in case you are looking to convert your video for you to resize it at the same time, then we also have the perfect tool that you can use. And this is no other than FoneDog Video Converter.
FoneDog Video Converter is a tool that you can use for you to be able to convert any videos from one format to another easily and quickly. As we said, FoneDog Video Converter does actually support multiple types of formats, at the same time, it also comes with a high-speed conversion process. And the best part about it is that it will not affect the high-quality of the video you are working on. And to show you how you can use FoneDog Video Converter easily, below is a guide that you can follow.
Of course, the first thing that you need to do is to download and install FoneDog Video Converter on your Mac or Windows computer. And once done, launch it to start using the program.
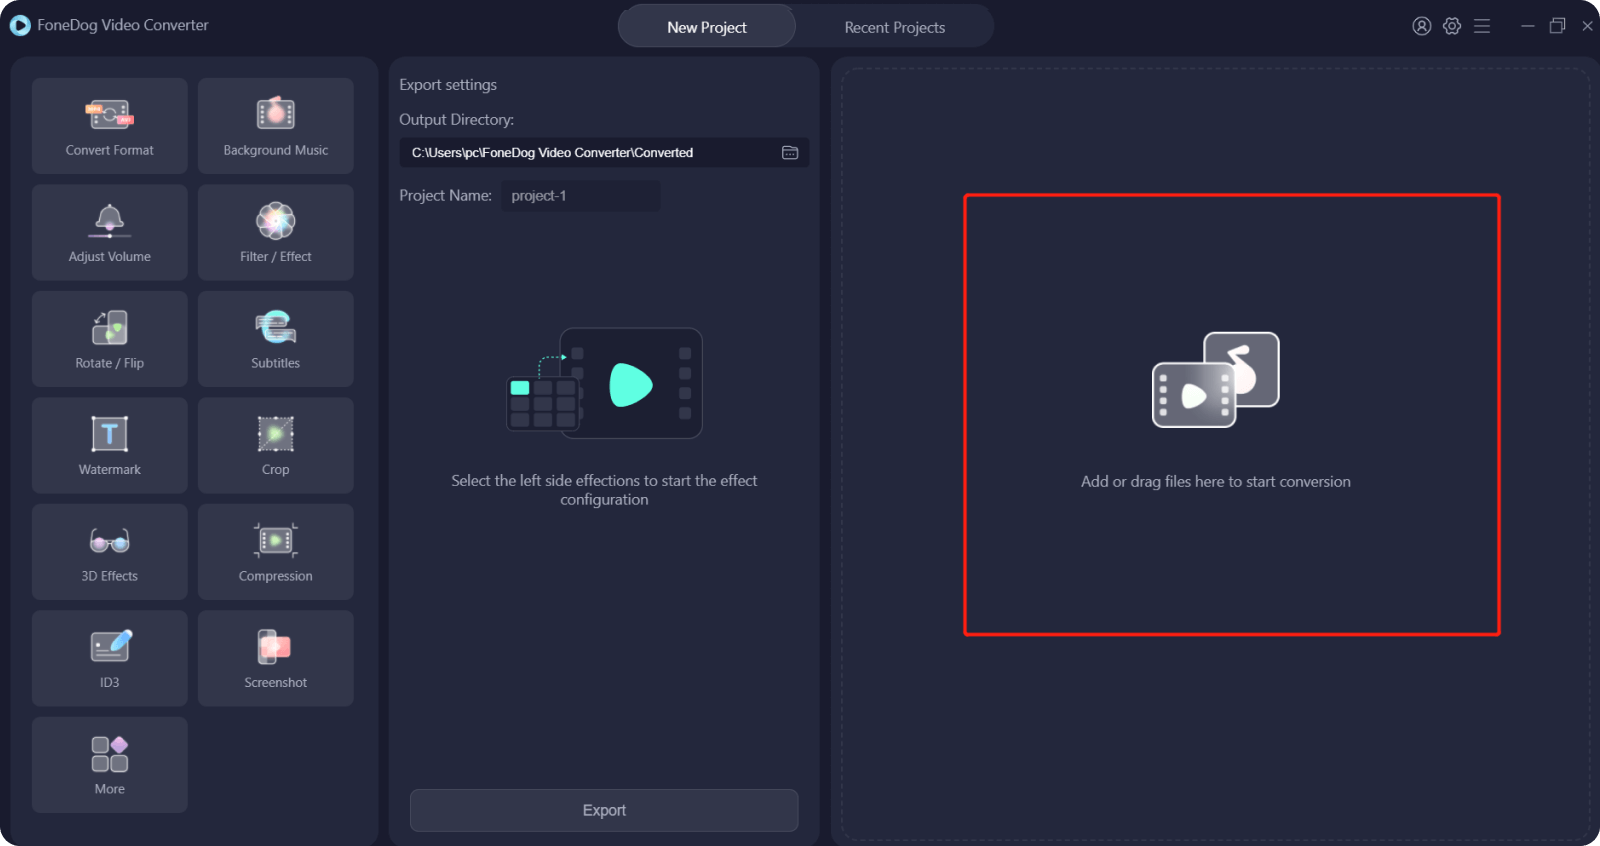
On the main interface of the program, go ahead and drag or add the video that you want to work on. You can drag it over to the main interface of FoneDog Video Converter, or you can also click on the section that says, “Add or drag Files here to start conversion”.
Then, simply click on the “Convert Format” option located on the left side of your screen and choose your desired format. Also, while you are on this page, go ahead and select the location where you want to save your converted video. Then click on the Save button for you to save the changes you made.
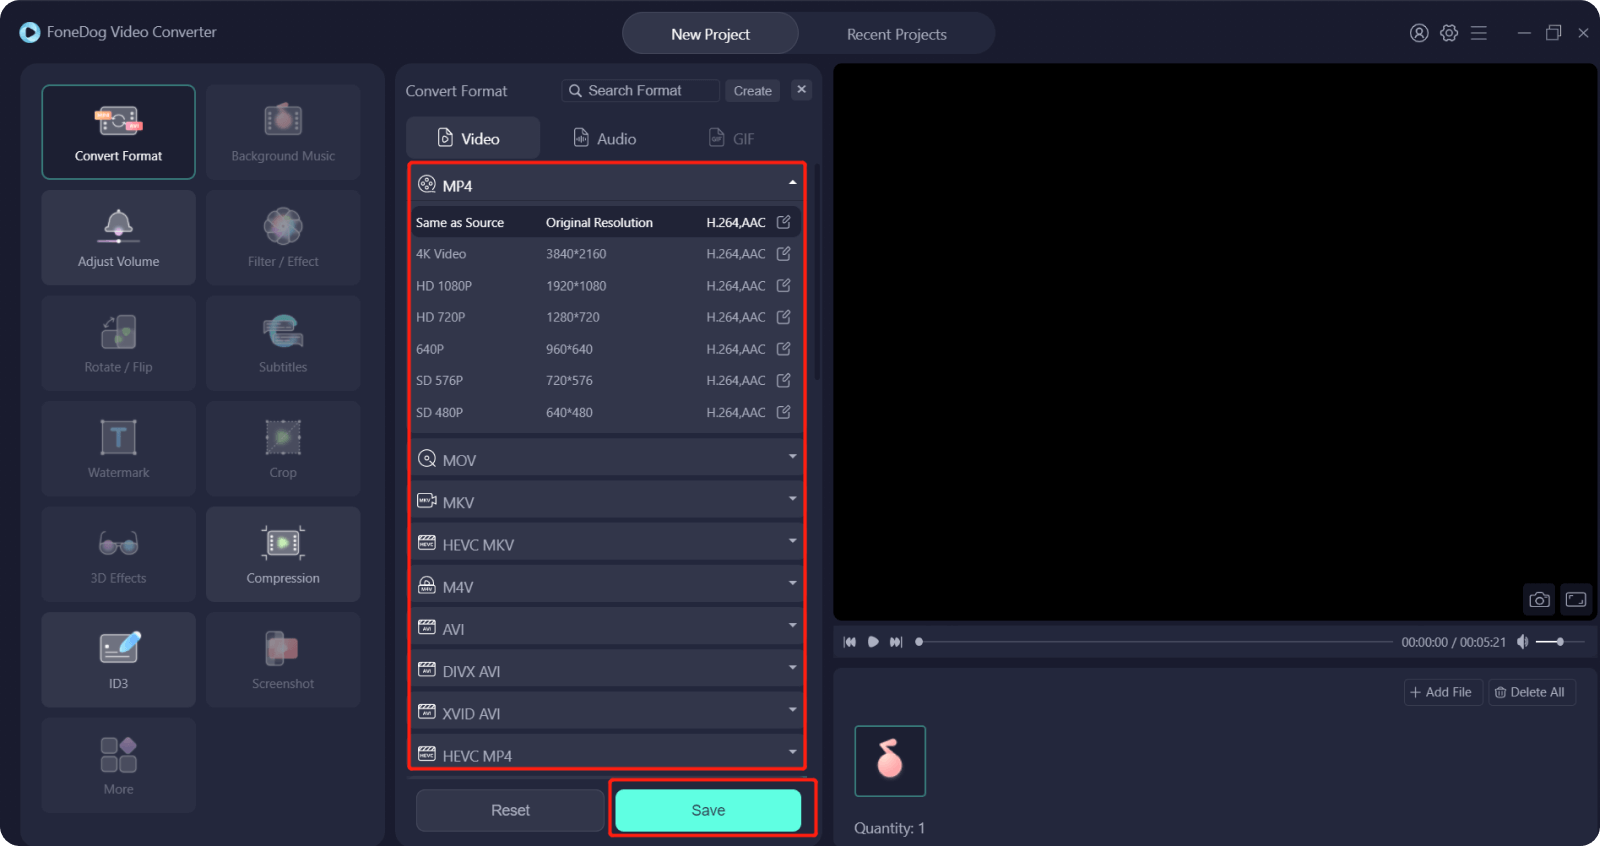
Once choosing your desired format, you can now go ahead and click on the Convert button. The process of converting your video will then begin. Once the conversion is complete, you can review the converted video from the Recent Projects folder.

People Also Read[Solved] How to Easily Edit Video with VLC in 2024The Best QuickTime Movie Editors in 2024 – A Must Try!
Using the Adobe Premiere resize video to fit is very easy and even beginners can use it. And with this, you will be able to free up space on your computer or on your mobile device. And in case you needed also to convert some of your videos after reducing their size then, what we highly recommend you to use is FoneDog Video Converter. As this is the best tool when it comes to converting videos and audios without compromising their quality.
Leave a Comment
Comment

Tech Website Writing /Content Optimization
Singing, smiling, surprising every day!
So as a technical writer, it is my duty to gather effective and reliable solutions to answer questions on how to deal with the issues they are having with their devices.
Hot Articles
 /
/
INTERESTINGDULL
/
SIMPLEDIFFICULT
Thank you! Here' re your choices:
Excellent
Rating: 4.7 / 5 (based on 65 ratings)
