

By Nathan E. Malpass, Last updated: March 8, 2017
"My notes somehow were deleted from my phone... I never unselected notes to not be synced. Need them back.. Very important info!!"
Aside from Reminders, the Notes in your iPhone is another application you can use for quick note-taking of small yet important details you need to keep a record with. These details can be birthdates of your family or friends, a list of to-do’s, grocery shopping list, training and lesson notes, books to buy, costs for a movie you have recently watched, and much more. This application helps not just in organizing your daily activities but also in keeping yourself reminded of significant details that will be surely used in the future.
But just like other files and data that you have on your iPhone, it is also possible to suddenly lose your notes as well. If you are here and reading this, you might be currently in the situation that all the notes you have in your phone went missing (or someone close to you is experiencing this). But how come this event has happened? Read ahead, you will know the 6 main causes and 5 ways of how to recover deleted notes on iPhone/iPad.
6 Possible Reasons Why iPhone Notes DisappearedWay 1: How to Retrieve Your Deleted Notes from "Recently Deleted Folder"Way 2. How to Recover Deleted Notes on iPhone iCloud BackupsWay 3: Recover Deleted Notes without Any Data BackupsWay 4: Recover Deleted Notes Using “Recover from iTunes Backup File”Way 5: Recover Deleted Notes Using “Recover from iCloud Backup File”Video Guide: How to Recover Deleted Notes on iPhone 6/7/8/X/11/SE
There are a few reasons as to why your notes went missing.
But we have laid out steps that you can follow to get them back. Retrieving your deleted notes will need you to perform the most common retrieval process first.
There are two direct ways to retrieve your deleted notes based on how they went missing from your iPhone. The first one is through restoring it straight from the “Recently Deleted” folder of the Notes application. Similarly, with the Gallery, this folder holds all recently deleted notes that will stay there until you permanently delete all the files inside. To recover them from this folder, follow the steps below.

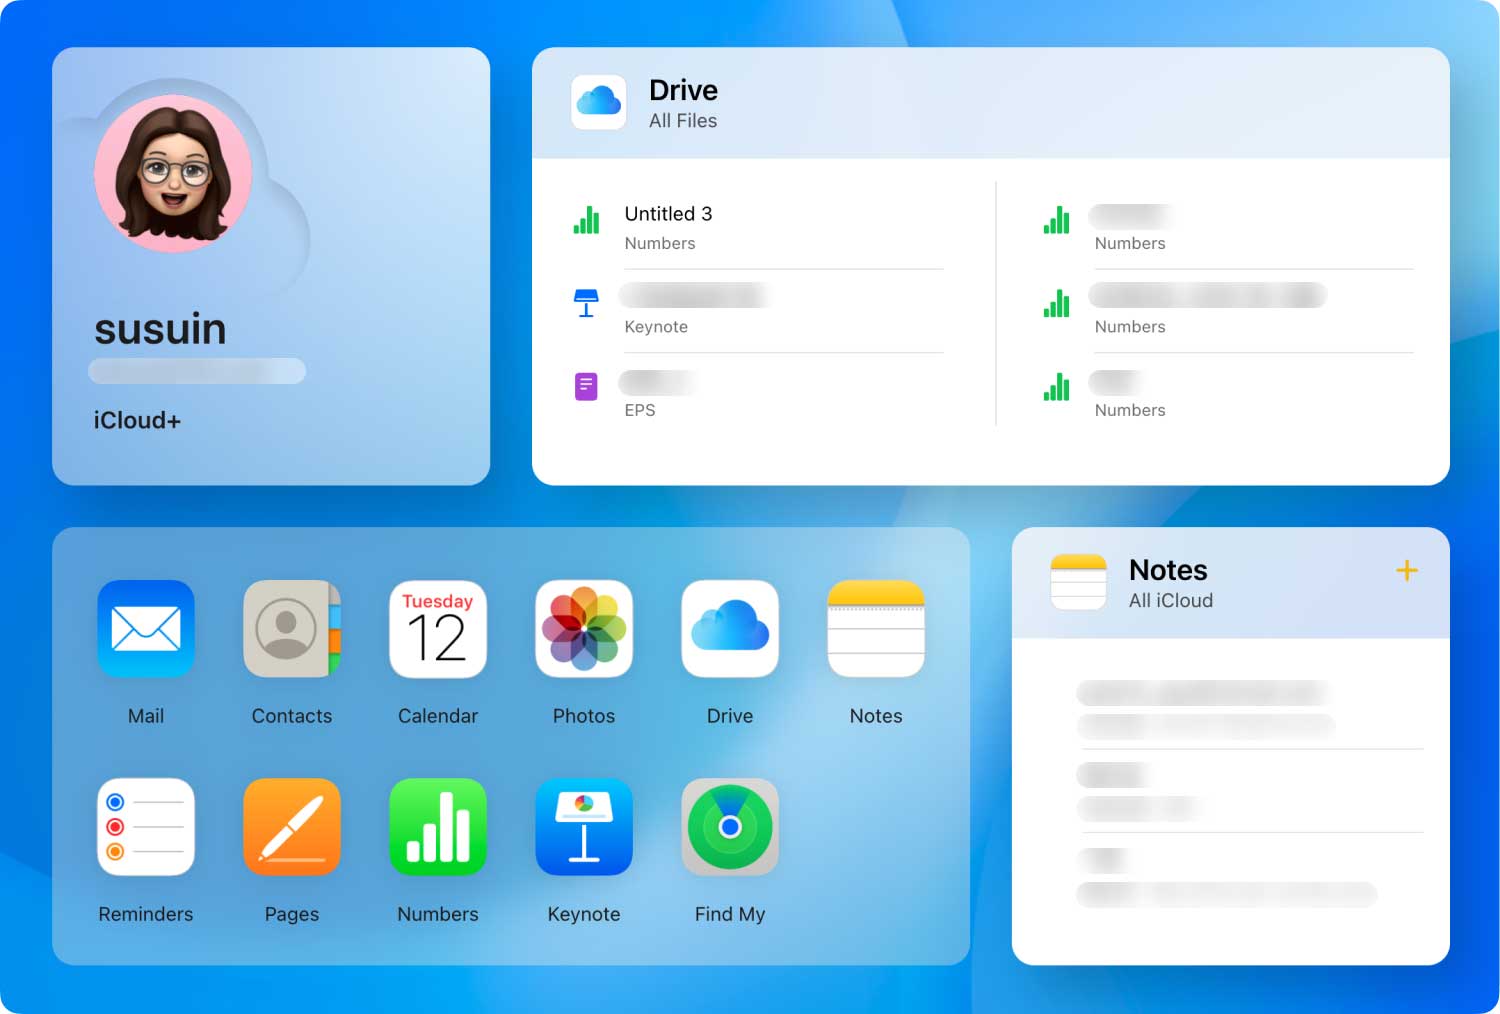
No recently deleted notes folder on iPhone? How to recover permanently deleted notes on iPhone? Another procedure to do is to retrieve the last backup of your device that you have made to iCloud. If you have activated the automatic backup and sync settings of your iPhone, we are sure to retrieve your missing notes from your iCloud back to your phone. Just take note of when you have last performed a backup, as this can help you find the one to restore later on. To proceed on these, follow the steps below:
If you fail to restore your deleted notes from “Recently Deleted” folder or from one of your backups from iCloud, we got you covered through our FoneDog toolkit – iOS Data Recovery.
FoneDog toolkit – iOS Data Recovery is a tool that provides comprehensive instructions on how to retrieve different types of data that got deleted from iPhone devices. It can retrieve several file types such as contacts, photos, videos, reminders, text messages, iMessages, calendar events, bookmarks and more. And because your notes got deleted, FoneDog toolkit can help you on this through its three recovery modes – the “Recover from iOS Device”, the “Recover from iTunes Backup File” and the “Recover from iCloud Backup File”.
We can retrieve your deleted notes through this first recovery option. Before you begin, make sure you have a computer to use, and your iPhone device must be connected to it using its USB connector.
For the first step, ensure that you have already connected the affected iPhone device to your computer. Once done, launch FoneDog toolkit. Its main screen will show that your iPhone has been connected to the computer.
iOS Data Recovery
Recover photos, videos, contacts, messages, call logs, WhatsApp data, and more.
Recover data from iPhone, iTunes and iCloud.
Compatible with latest iPhone 11, iPhone 11 pro and the latest iOS 13.
Free Download
Free Download

While currently on the main screen, select the “Recover from iOS Device” option from the left panel of the application window. This will get you started in recovering your deleted notes.

To perform the scan, click the “Start Scan” button found at the bottom-right part of the application window. This will scan the iPhone device connected to your computer, and will detect all your current files, as well as traces of all the ones that were deleted since the first day you are using your phone.

The scan process may take a while, as it searches for all the files you have on your device, including the ones that got deleted. Once done, all your files can be verified as retrieved from the left side of the program window, wherein they are categorized according to their file types.
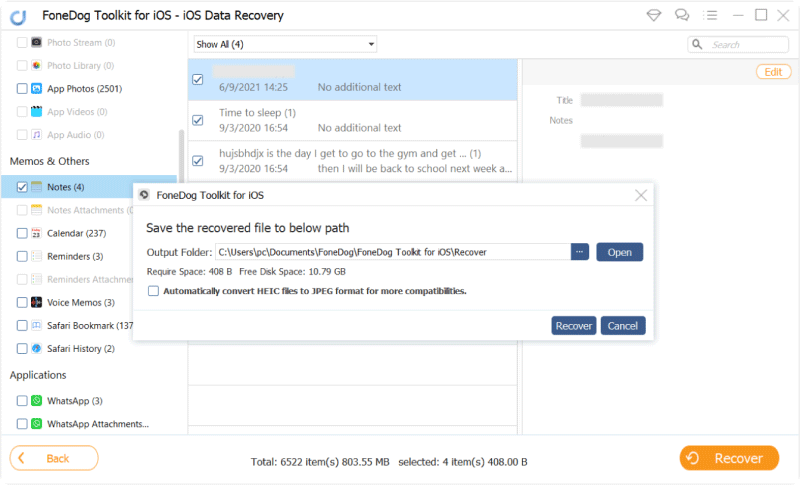
On the left panel of the Data Recovery screen, locate “Memos & Others” and look for “Notes”. This category contains all the current and deleted notes from your phone. Click this category to get a preview of all the notes you wish to be reclaimed.
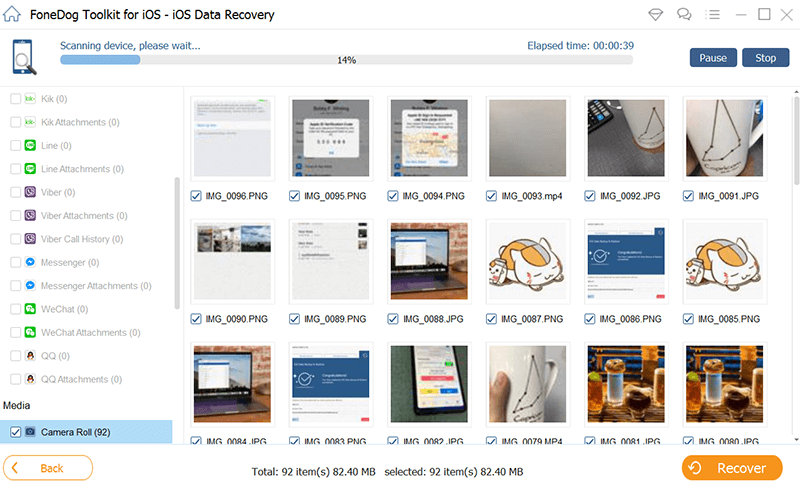
FoneDog toolkit offers a quick preview of notes for you to check first if you have to recover all the notes or just a few of them. If you have chosen a note to retrieve, just click the small checkbox on its left side to select it. After making your selections, click “Recover” to retrieve and store them locally on your computer.
If you have recently performed a backup of your files on your iPhone to iTunes, we can use this second recovery option to retrieve the notes that went missing from your device.
iOS Data Recovery
Recover photos, videos, contacts, messages, call logs, WhatsApp data, and more.
Recover data from iPhone, iTunes and iCloud.
Compatible with latest iPhone 11, iPhone 11 pro and the latest iOS 13.
Free Download
Free Download

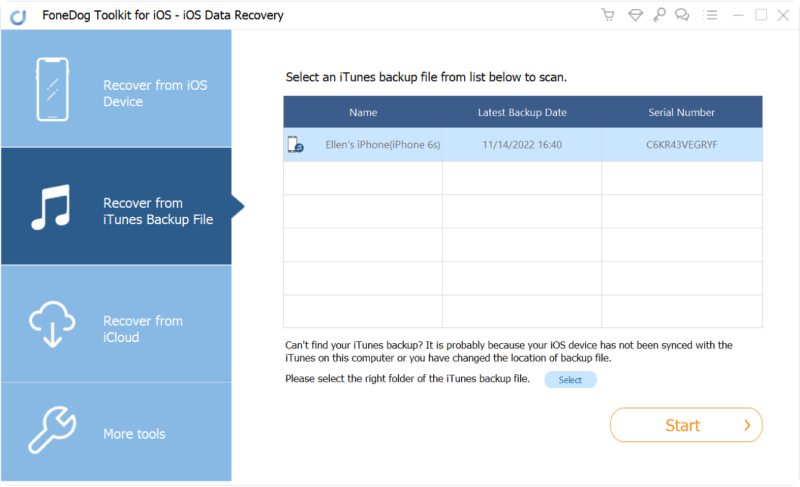
If the first recovery option didn’t work for you, switch to the second one – the “Recover from iTunes Backup File”. This recovery mode will help you retrieve your deleted notes from the backups you have made to iTunes. To begin, select this option from the left panel of the application window.
FoneDog toolkit will detect your iTunes backup from your computer, and will also do the same on your phone if it’s still connected to the machine. On the window, select where to get the backup from.

After selecting the iTunes backup file, begin the scan by clicking the “Start Scan” button located on the bottom-right portion of the program. This will start the scanning process, looking into the files saved to the backup, and extracting them for a preview later.
Once the scan is complete, FoneDog toolkit will show you all the files it has extracted from the iTunes backup you have previously selected. These files will be shown according to their categories. Since we are looking for your deleted notes, find the “Notes” category under the “Memos & Others” section on the left panel of the program. When done, all notes found from the iTunes backup will be laid out to you.
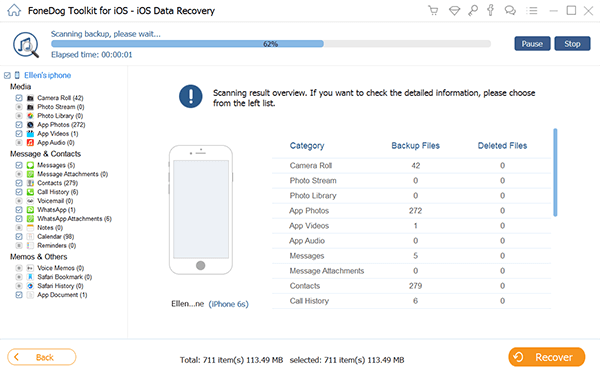
From the “ Notes” category, all the notes contained in the scanned iTunes backup will be shown to you. You can take an instant look of each of the notes available, and after deciding which one to retrieve, select them by clicking the checkbox button on the left side of each item.
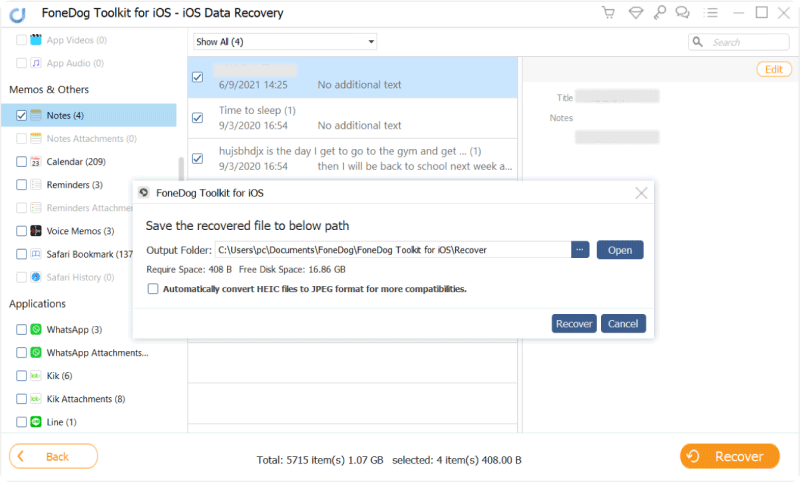
After selecting the notes to be retrieved from the backup, click the “Recover” button found on the lower-right portion of the screen to retrieve the selections and save them to your computer. Select your iPhone device and confirm the retrieval process.
Lastly, we have the recovery option that will allow you to access and restore backup files that you have saved to the iCloud. Backing up and syncing your device to the iCloud is a secure way of keeping your files and data private and well-kept. And restoring an iCloud backup to your iPhone is easy and secure as well. Follow the steps below on how to get your deleted notes from iCloud.
iOS Data Recovery
Recover photos, videos, contacts, messages, call logs, WhatsApp data, and more.
Recover data from iPhone, iTunes and iCloud.
Compatible with latest iPhone 11, iPhone 11 pro and the latest iOS 13.
Free Download
Free Download

Click the Home icon found on the topmost left corner of the application window to go back to our main window. Then, on the left panel, select the third recovery mode in the list.

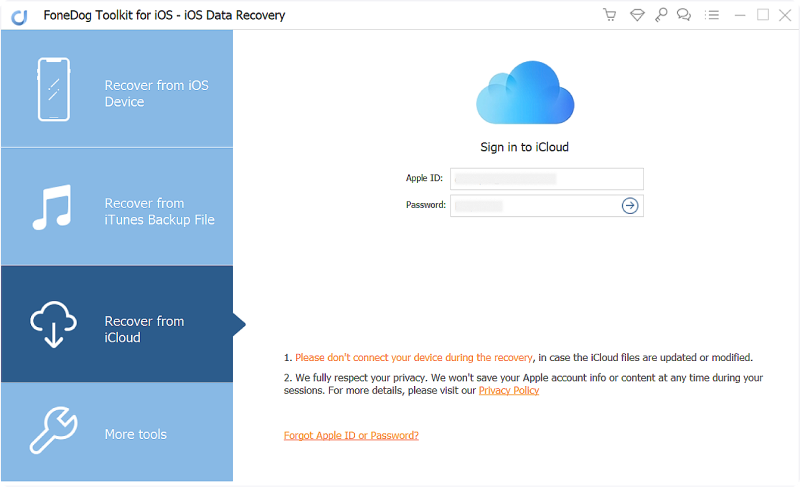
After switching to this recovery mode, you will need to login to your iCloud account. This is vital because FoneDog toolkit will need to access your backup files from iCloud. We ensure to you that dr.fone toolkit will not keep your data for any purpose or usage except for retrieving your backup files and in restoring the deleted notes from your iPhone device.
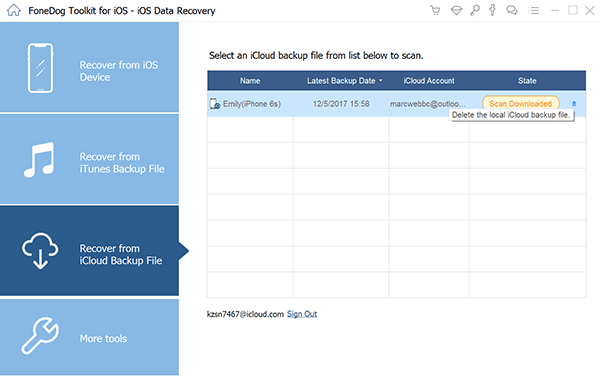
After signing in, FoneDog toolkit will start to show all the backup files you have in iCloud. Take a moment in carefully selecting the backup file that has the highest chance of containing the notes that went missing from your phone.
After selecting the backup file, FeneDog toolkit will open a small window showing categories of files to choose from. By default, all file types are selected. To select just the “Notes”, untick first the “Select All” option from the bottom-left part of the model and then select the checkbox for “Notes”. Click “Next” to proceed in the scan process.
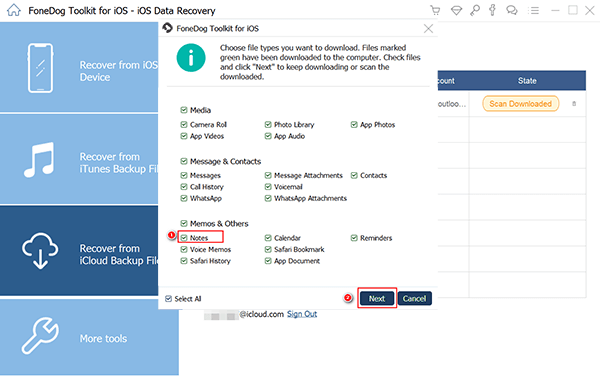
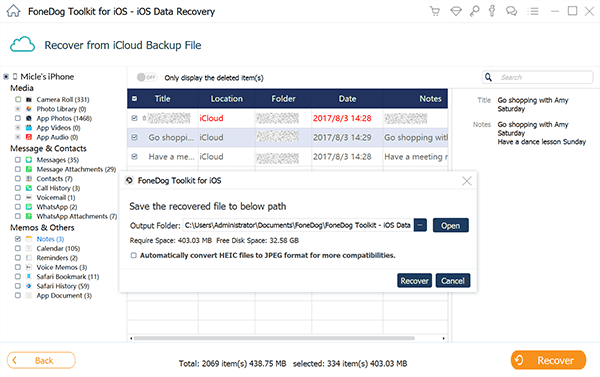
FoneDog toolkit will now show you all the notes found in the backup file. Take your time in reviewing them so you are sure to restore the ones you need the most. Afterward, recover the selected notes by clicking the “Recover” to save local copies of the notes on your computer.
Recovering the deleted notes from your iPhone are now made simple and effective using our FoneDog toolkit – iOS Data Recovery. With our recovery modes to choose from, you can retrieve your notes fast, especially when you have backup files stored in iTunes or iCloud. Moving forward, start performing backups of your iPhone files and data so you can prevent experiencing extreme hassles in recovering your lost or deleted files.
Leave a Comment
Comment
iOS Data Recovery
3 Methods to recover your deleted data from iPhone or iPad.
Free Download Free DownloadHot Articles
/
INTERESTINGDULL
/
SIMPLEDIFFICULT
Thank you! Here' re your choices:
Excellent
Rating: 4.6 / 5 (based on 107 ratings)