

By Gina Barrow, Last updated: October 23, 2018
“How can I downgrade iOS 11 Beta to iOS 10.3.3? Because I find the iOS 11 is not stable when I found out that my photo gallery is empty but they reappeared after some time and it scares me to think I might lose them permanently if this will continue, I will just wait for the stable and official version of the iOS 11 to use on my device”
If you are one of those people who find the new iOS Beta 11 too laggy and buggy regardless of what beta version you are using, or just simply uncomfortable with it, there is a way for you to downgrade to a lower iOS version that Apple has signed up with.
There are only two firmware versions that you can downgrade into just in case, you might change your mind about the iOS 11 Beta, the iOS 10.3.2 and iOS 10.3.3 which are more stable versions.Safe to say that downgrading from iOS 11 to 10.3.3 is very much possible as long as you do it properly.In this article, you will learn how to downgrade iOS 11 Beta to 10.3.3 easily.
Part 1. Getting Ready to Downgrade iOS 11 Beta to 10.3.3Part 2. Easy Steps to Downgrade iOS11 to 10.3.3Part 3. How to Downgrade iOS 11 to 10.3.3 SafelyPart 4. Recommendation
Before you are able to downgrade iOS 11 Beta to 10, remember these two important things:
If you have fully understood all these, let’s go on the next steps on how to downgrade iOS 11.
In order for us to Downgrade iOS 11 Beta to 10.3.3, make sure you are running on the latest iTunes version on your Mac or PC. If not yet updated, do it to avoid any incompatibility issues that may arise.
Step 1. When you have finally updated iTunes, Turn off “Find My iPhone” from your device by going to Settings>iCloud Account>iCloud>Find My iPhoneslider off and download the IPSW file restore image for 10.3.3 that matches your device from Apple’s Beta Software site.
Step 2. Hook up your iPhone to the computer using an original USB cable that came along or as long as it is from Apple. After successful connection, enter the device into DFU mode by following these steps:
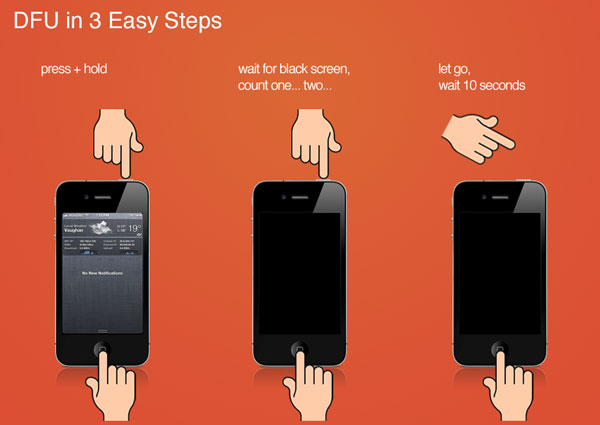
Step 3. Once you have entered into DFU mode, open iTunes and a pop-up window will automatically show asking you to “Restore”. Tap restore and another window will ask for you to restore and update, just simply click on it to confirm.
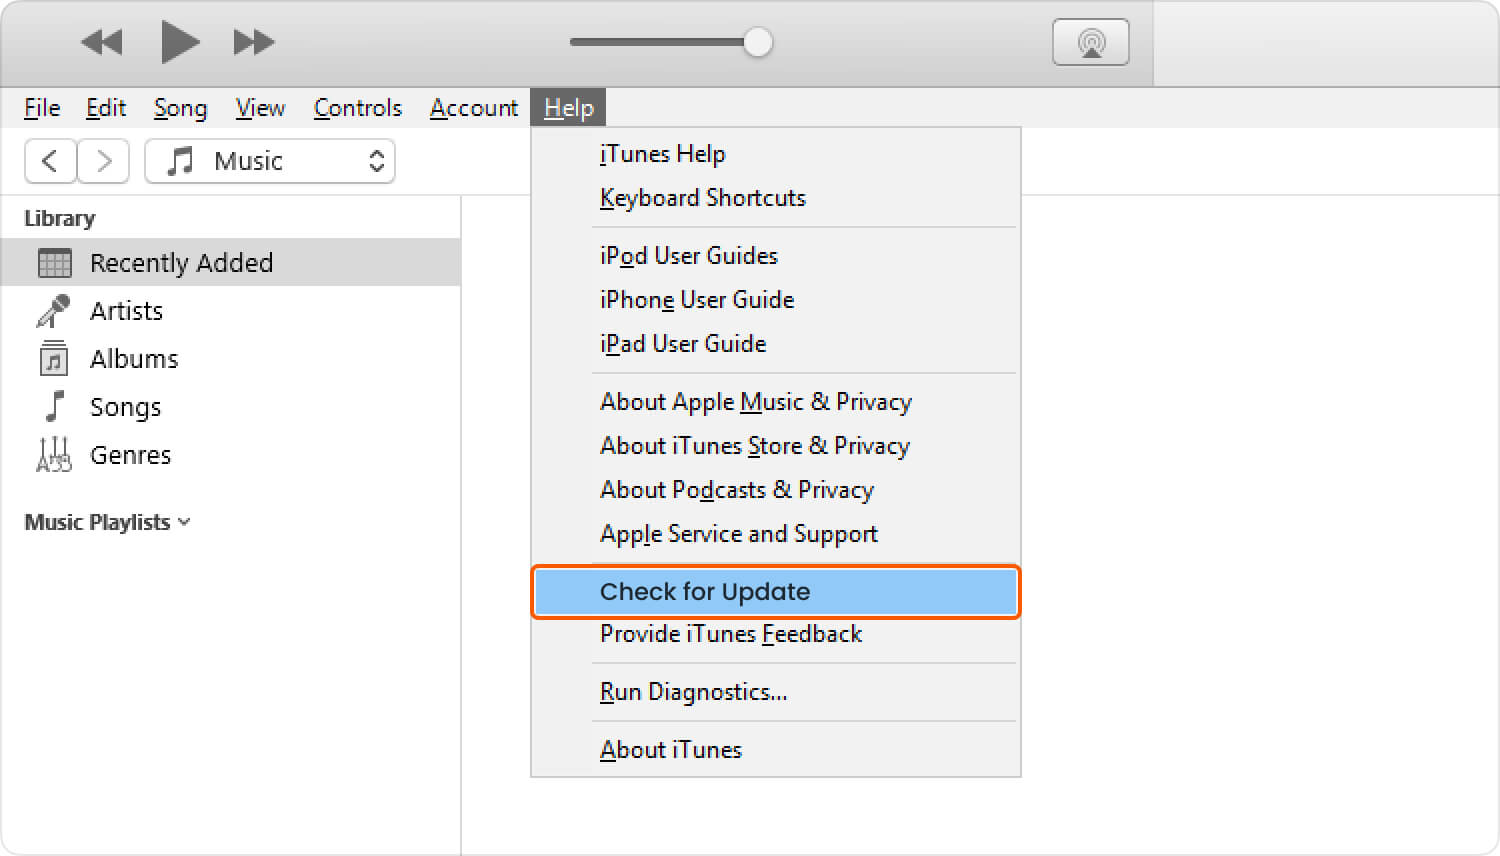
Step 4. Click check for updates to allow you to use the 10.3.3 software you downloaded earlier. On your Mac PC, hold Options key and click on Check for updates to open file explorer and then select that IPSW file you downloaded a while ago. If you are using a Windows computer, hold the Shift key and click Check for updates and do the same.
Step 5. Click on User agreement and wait until the iOS 10.3.3 will be completed. Your iPhone will reboot several times in order to fully implement the newly installed iOS.
Step 6. You can then restore from your iTunes backup file for you to get your apps and other contents back. If by any chance that you got stuck on the Apple logo screen or white screen or simply the software fails, just turn off the phone and restart the whole process.
If during the downgrade process that the software fails to install on the iPhone and restarting the phone did not help, you need to look for advanced ways to get pass-through this issue. There is a popular program called FoneDog iOS System Recovery that fixes all issues regarding iOS failures or boot up errors and even freezing, white screen, and other system issues safely and easily.
Most of the time when you perform an upgrade or downgrade to your iOS device, there comes a point that the iOS device will experience getting stuck to the Apple icon only even if you tried to reset the phone several times. This can be caused by software incompatibility and for a variety of reasons.
If left unfixed, this could brick your iPhone and become totally useless. To avoid getting stuck on this error, here is the real fix to these kinds of issues- use FoneDog iOS System Recovery wherein you don’t need to become a technical expert for you to fix this issue. All you need is to download and install the program and it will do the rest of the tough jobs for you.
FoneDog iOS System Recovery can safely downgrade iOS 11 Beta to 10.3.3 without any data loss and complicated methods. This program will downgrade iOS 11 beta using DFU mode and by letting you choose the iOS version you can apply as a fix. To find out how FoneDog iOS System Recovery really works, check these steps below:
FoneDog iOS System Recovery is compatible with both Windows and Mac computers where you can easily download it from their website or by simply clicking on the given link. After downloading, you need to install the software by following the on-screen instructions and launch the program right after to begin the downgrade and recovery procedures.
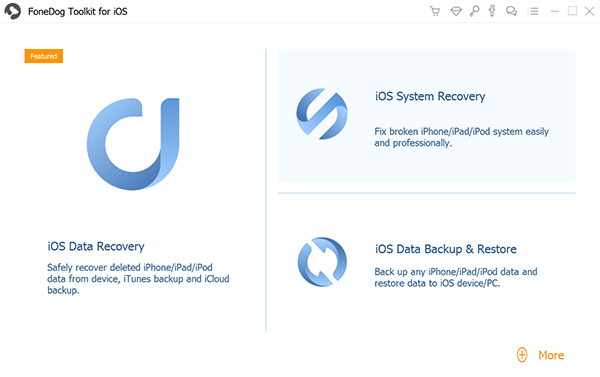
When the program has successfully launched, click on “System Recovery” among the tools shown on the main menu and then connect your iPhone using the original USB cable. Click Start when the connection between two devices is established.

To safely downgrade iOS 11 Beta to 10.3.2, you need to enter into DFU (Device Firmware Upgrade) mode or recovery mode. To enter DFU mode, hold the Home and Power buttons for about 10 seconds and then release the Power button while still holding the Home button. The software will detect once the device has entered into DFU mode.
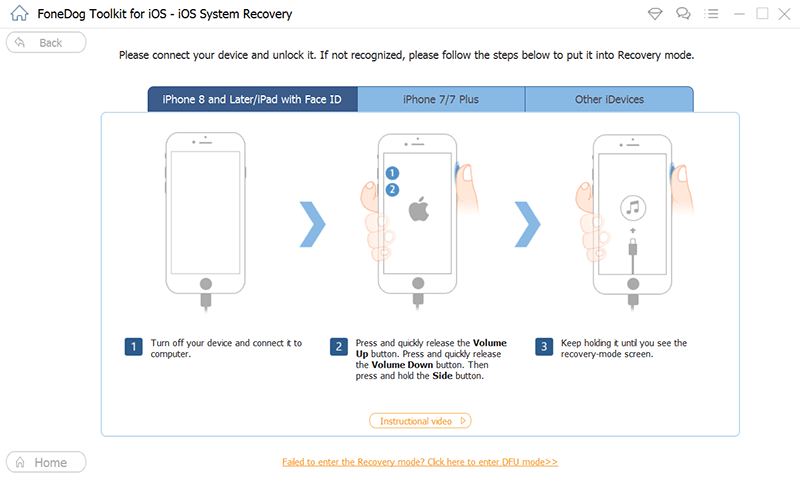
After you have successfully put the device into DFU mode, you need to download and install the firmware package by entering the correct phone model and firmware version you want. You can refer to the drop-down selection of the firmware package you would like to apply on the iOS device since you would like to downgrade iOS 11 betas to 10.3.3. Click download to continue. Wait until the download is completed and fully applied on the iPhone. It may take some time since the file size is quite larger.

FoneDog iOS System Recovery will start the repair process once the download is completed. You will be prompted once the repair is done and the iOS device will reboot normally. If the iPhone does not reboot normally, then you might need to redo the process by clicking the Try Again button.
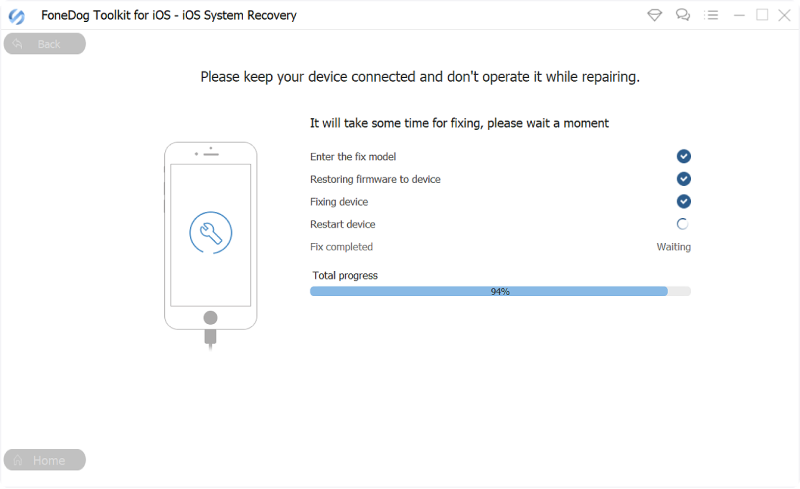
FoneDog iOS System Recovery will start the repair process once the download is completed. You will be prompted once the repair is done and the iOS device will reboot normally. If the iPhone does not reboot normally, then you might need to redo the process by clicking the Try Again button.
What have you experienced with the new iOS 11 beta so far? It is both fun and hassle. It is fun to be a part of the Apple team who can experience first-hand all the latest features the new iOS 11 betas has in store. With all the new updates and upgrades they have done with most major apps, it is truly exciting to think about using the new iOS. However, it can be annoying how bugs can affect your phone experience especially if you are in a hurry or on an important transaction.
These bugs can even cause data loss at some point so it highly recommended that you install and use the iOS 11 Beta on a secondary device wherein you don’t have much apps or data to lose. But in case you find it too inconvenient already, you can always downgrade iOS 11 betas to 10 by using FoneDog iOS System Recovery.
And in any case you might experience certain issues like stuck at Apple Logo, white screen, black screen or blue screen, you can also rely on FoneDog iOS System Recovery, this program will repair your iPhone back to normal and lets you downgrade it back to 10.3.3 without any hassle.
Leave a Comment
Comment
iOS System Recovery
Repair various iOS system errors back to normal status.
Free Download Free DownloadHot Articles
/
INTERESTINGDULL
/
SIMPLEDIFFICULT
Thank you! Here' re your choices:
Excellent
Rating: 4.6 / 5 (based on 94 ratings)